

Crochet Pumpkin Motif (c)mytrailinghobbies.wordpress.com 
Halloween Crochet Pumpkin Motif (c)mytrailinghobbies.wordpress.com 
Halloween Crochet Pumpkin (c)mytrailinghobbies.wordpress.com


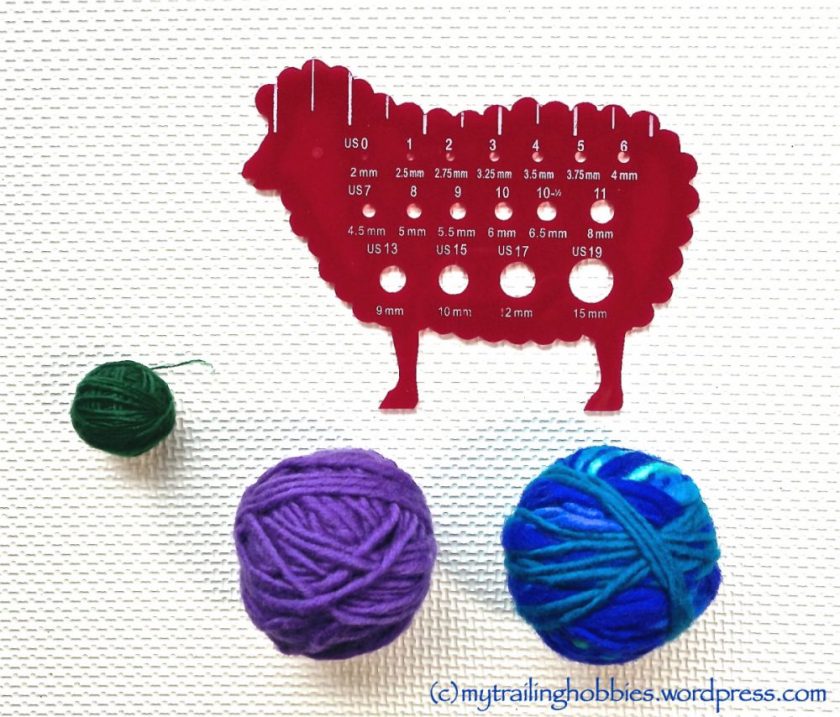
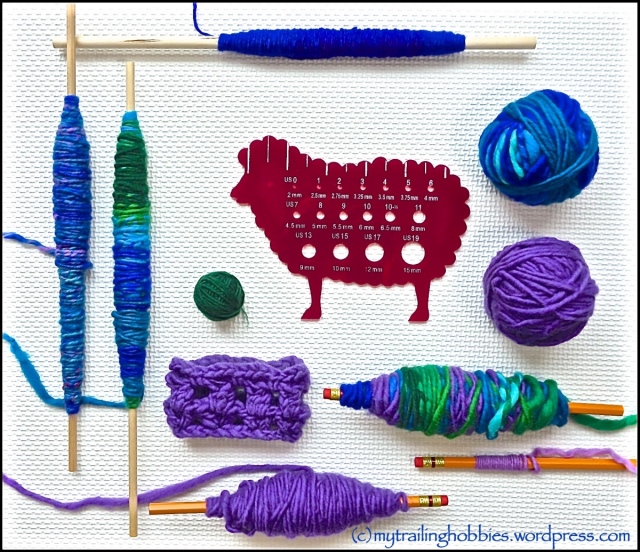
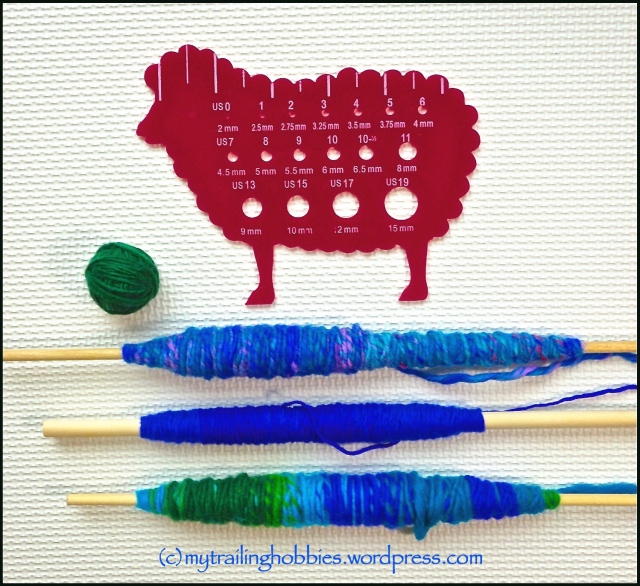
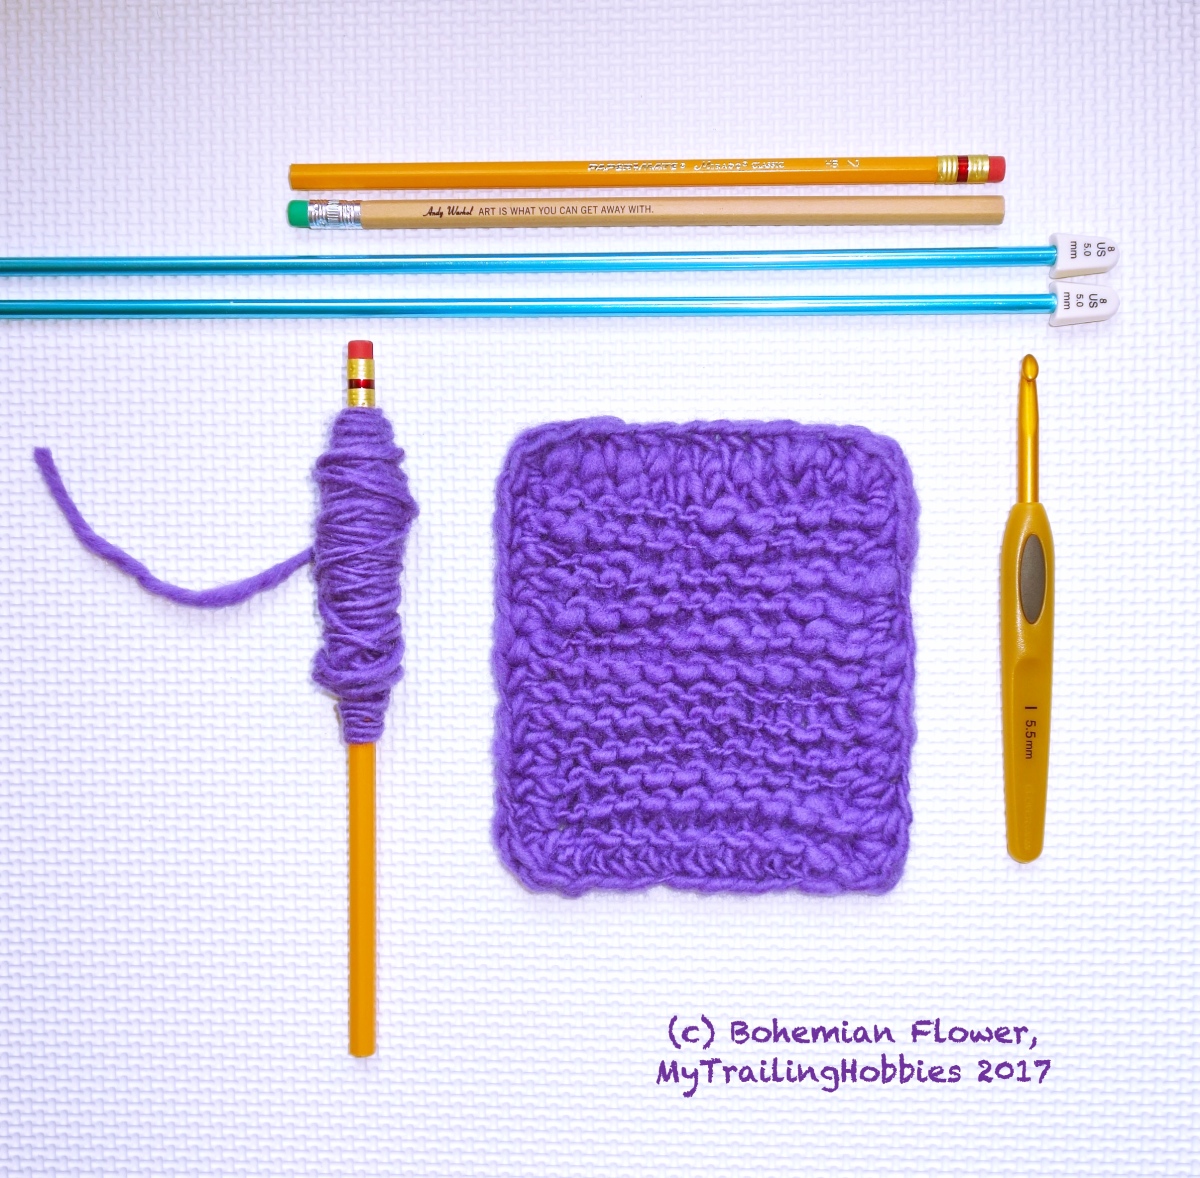
I’ve hand-spun a portion of my felting wool stash into a few balls of yarn – all s-twist singles, each of a different thickness, amount of twist, and a different colorway. Here are a few samples:
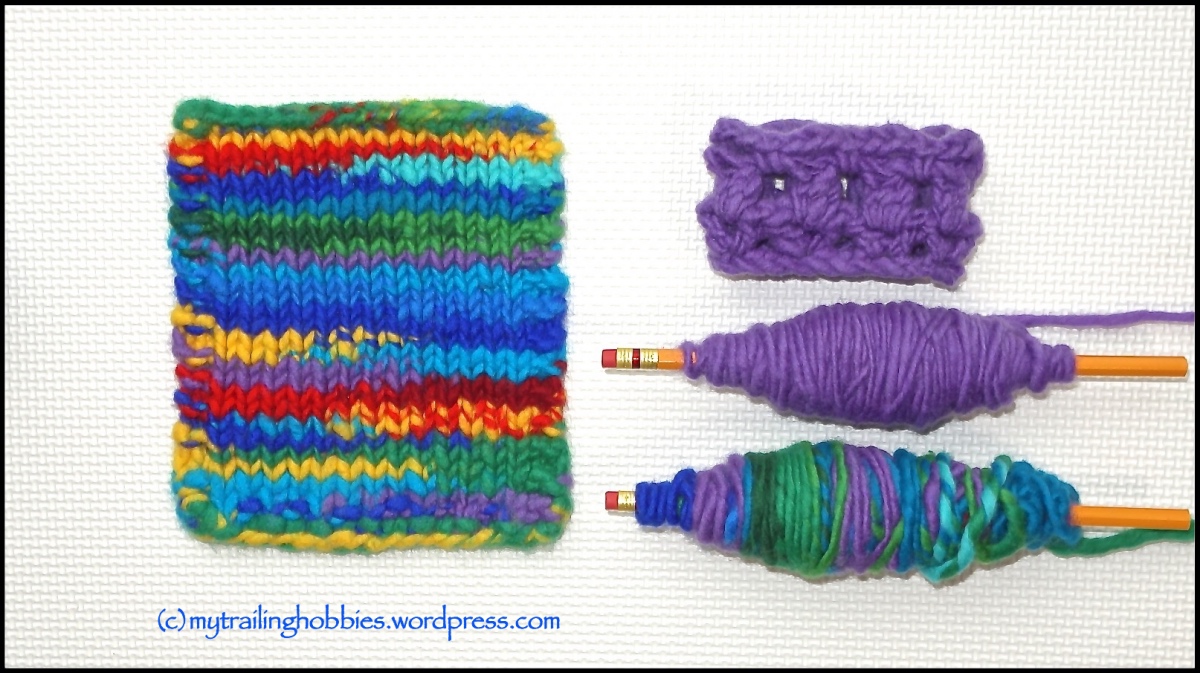
The simple bracelet in the pic, I’ve crocheted out of a bulky type piece and then wet-felted it to minimize potential pilling, which is more likely than not to happen since I didn’t ply the thread. I’ve been wearing the bracelet for a while and even washed it in between – it’s totally fine and I absolutely love it.
This one is a little plain knit block – the colorway reminds me of a field of spring flowers:
As you can see, I’ve been using plain #2/HB pencils and craft sticks for spinning. The sticks are longer than pencils, which allows you to hold more yarn, so there’s no need to wind it as frequently…That and pet brushes for color blending 🙂 is all you need to begin spinning your DIY yarn without investing into professional tools before you decide whether or not you like working with unspun fiber.

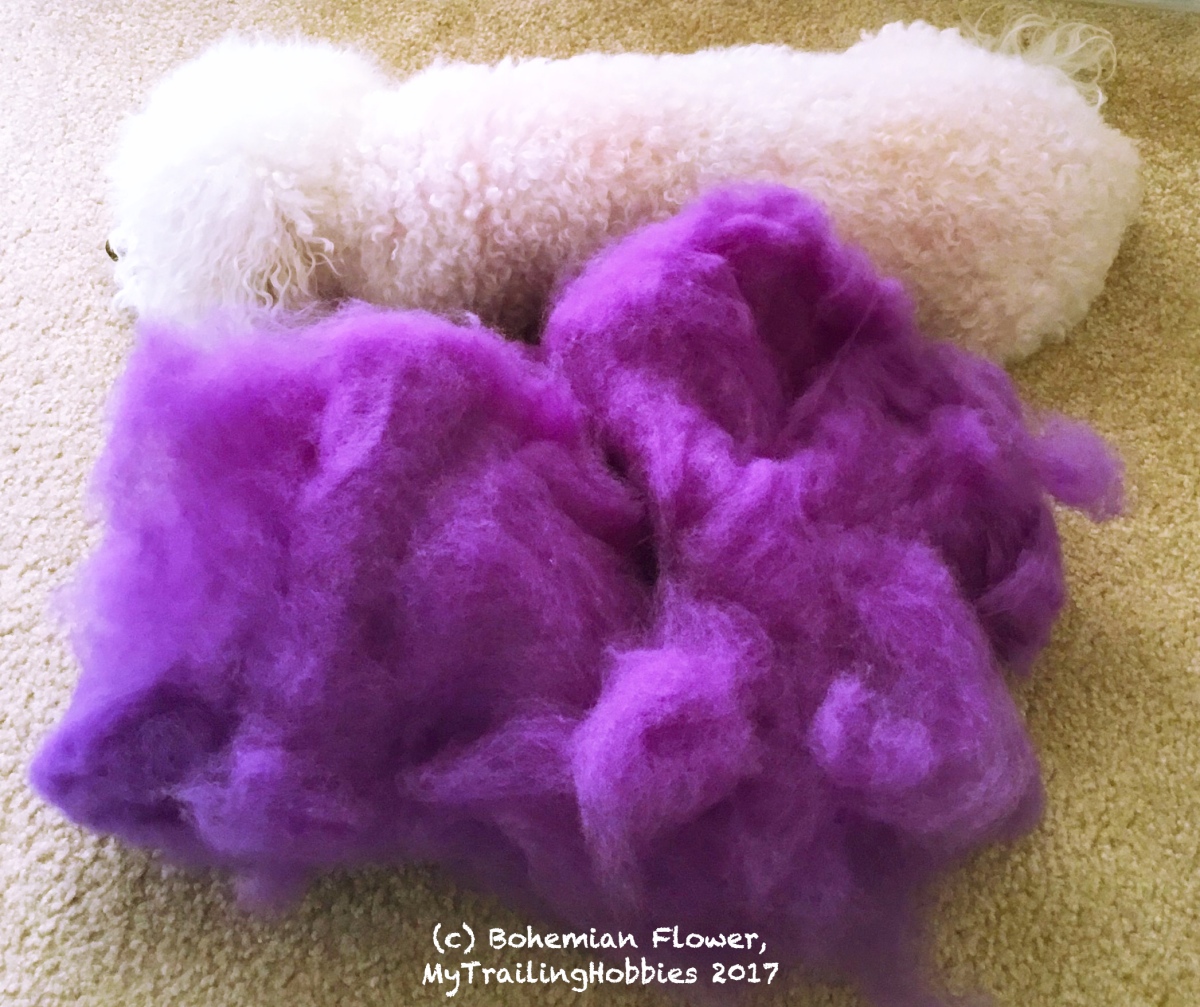
Actually, you don’t even have to use brushes if you don’t have any, just some fiber and a pencil/stick. That’s all. The colors can be blended by hand 🙂 The effect will be slightly different, but not in the least less attractive. And if you don’t have any felting wool – but have a fluffy dog – brush him/her nicely a few times and you are all set 🙂 Seriously! That’s what our ancestors, apparently, used to do. I recently read about it in a couple of books on nordic and Scandinavian knitting, but haven’t tried it myself yet. I still have a pile of felting fluff to work through 🙂 Although, as kids, my friend and I used to watch his grandma spin her fluff-ball dogs’ (she had two) hair into super thin thread. She probably blended it with other fibers/threads at some point…We were too young to think anything of the process, but we did like the nice and soft socks and mittens she’d make for us with her own yarn.
Cheers!


Boy, did I take a break from my little online creativity sharing place… To make up for the time I’ve been mia, I’m getting right down to sharing some ideas with you, such as this mug rug I’ve made out of my own handspun yarn:
I wrote once, that I didn’t really knit (and used Tunisian crochet in my illusion crochet project, in place of illusion knitting); well, I do knit now! 🙂 … and I love it! I’ve knit the mug rug above using plain garter stitch to test out my “fantasy” yarn, and hdc-ed the border. I have 4 WIPs going on here as well, but I’ll share details later.
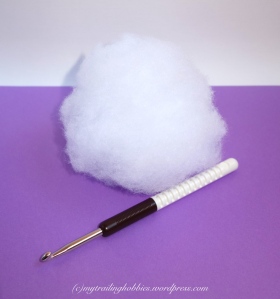
As you can see, I’ve tried my hand at spinning. It’s very low-tech, obviously 🙂 and pretty easy too! All you have to do is get some wool, such as felting wool/roving and a pencil – a regular #2 pencil will work great!


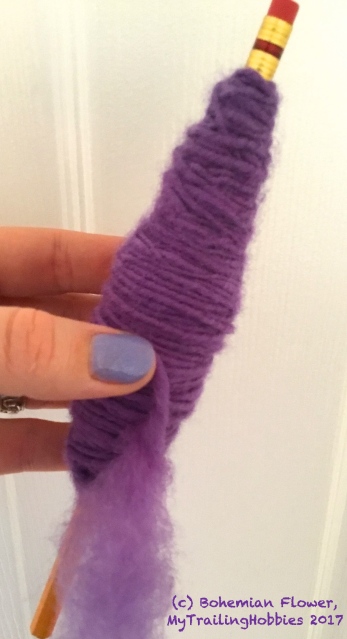
To begin, pull out some wool and twist the end. Wrap the end around the pencil, like in the photo above; try twisting the yarn clockwise, then counterclockwise, turn the pencil in different directions, feel which direction works best for you and stick with it.
Play with hand position – shift it frequently to avoid straining your hands and wrists:


Use your thumb to control the yarn end:
You can actually use any finger to control the end, there is no one right way to do that! Find the way that works best for you.
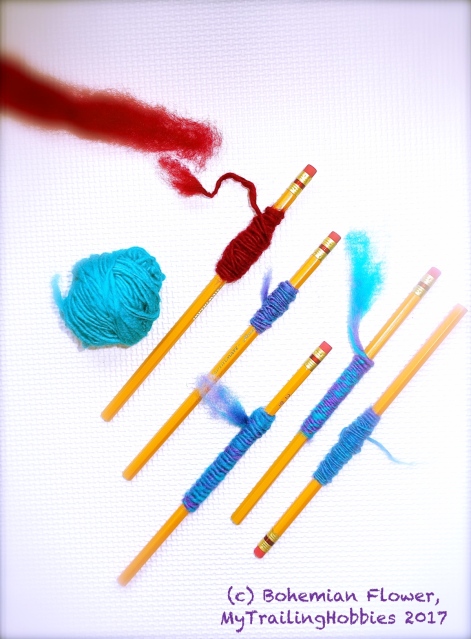
Keep pulling the fibers from the roving in relatively short sections, twisting and wrapping the yarn around the pencil:
If you need to take a break, like my pup here:
wrap the end around your work, and set the pencil aside:


It will (should) not unravel.
Play with the yarn thickness, the amount of twisting…try mixing colors too! To add wool of a different color, you can simply attach a new color section to your work, overlapping the fluffy tails and twisting them together.
To do some color blending, you can use plain brushes, if you don’t have special tools like carding boards. I used my pup’s brushes 🙂


Ideally, you should wind the yarn you create into a ball. Here’s one way to do it:


When knitting and crocheting my mug rug, I was working with the yarn right off of the pencil. It worked just fine.
I’m so excited I tried this. In addition to everything else, it’s a great “stash busting” activity and a very portable type of project – I’m going to bring some wool and a few pencils with me on my next long flight. Now I know my felting wool stash is not going to waste in the face of our upcoming move…While there’s no way for me to use it up, before our move, for wet- and needle- felting projects I originally bought it for, I can certainly turn it into yarn of different colors and textures. You’ll be surprised how fast and easy it is! And it’s fun.
If you’ve never tried making your own yarn, I highly recommend that you give it a try 🙂
Cheers!

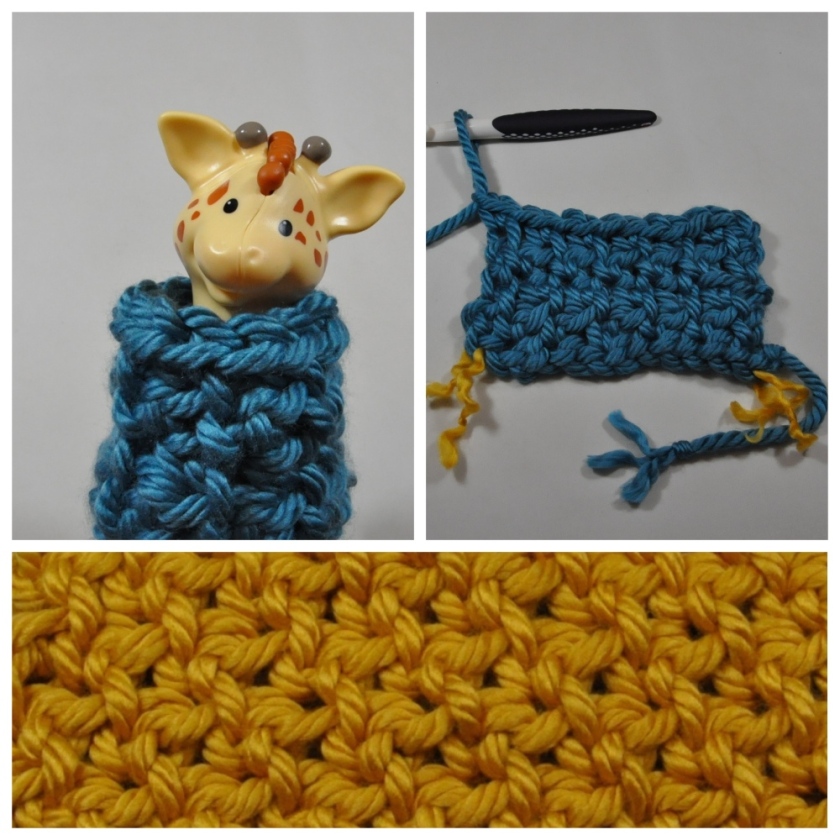
Yep, that’s a cowl for our giraffie 🙂
Woven Flowers/Tracks Reversible Crochet Cowl Pattern.
-crocheted with a magic hook!

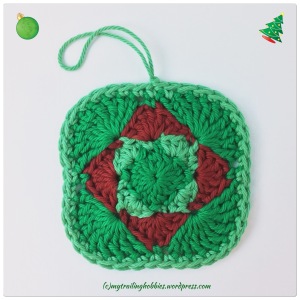
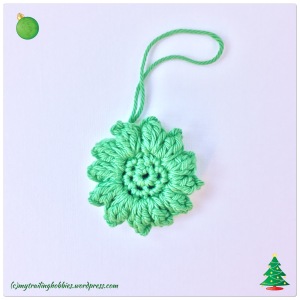
I’ve been busy making little Christmassy and NewYearsy thingies for me&family 🙂
Among other things, I’ve made a few facial washcloths – my first handmade ones. I’ve come across the idea of a crocheted cotton face cloth/scrubby here on WordPress, I believe when reading a post by “storytellingcook of Recipe in a Bottle” 🙂 I thought it was such a great idea I got some of my super soft cotton yarn out to make a few holidaysy ones this season 🙂 I mean, I’d tried making washcloths and dishcloths before, but a facial scrubby was a new one and absolutely my favorite 🙂 I also saw Ruthie’s Crafting Corner made some cute face washcloths! Aren’t we all on the same crochet wave!
Here’s my little sampler. I used “I love this cotton!” yarn – and I do LOVE this cotton, it’s so soft and gentle on skin!!! Next, I’m going to try some super soft bamboo…
This one is for me – I did a bit of layered crocheting here:
This one is for my mom – the motif comes from Linda Schapper’s book “300 Classic Blocks for Crochet Projects”:
This one is for me as well 🙂
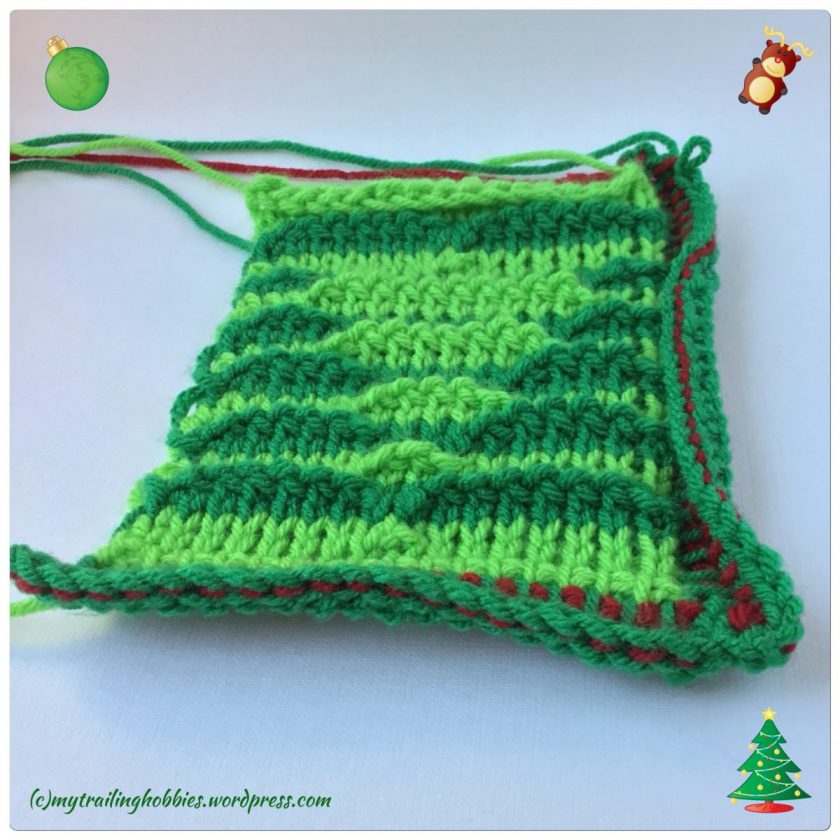
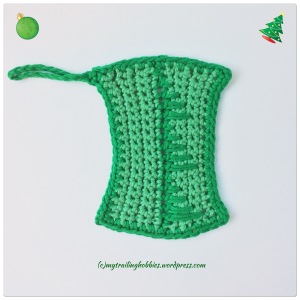
I thought I’d also share my WIP – a 3D Illusion Crochet Christmas Tree washcloth-to-be – my take on “Illusion Knitting“. I love this fascinating effect, but I do not knit (I tried knitting in the past, but it didn’t stick :). Tunisian crochet seemed like a great alternative to knitting in this case, so I improvised as follows:


Try it – it’s fun!!!
Have a great day!


– a hat for your favorite crochet toy – and, using a cookie cutter for shaping, needle felt a teddy bear for it 🙂
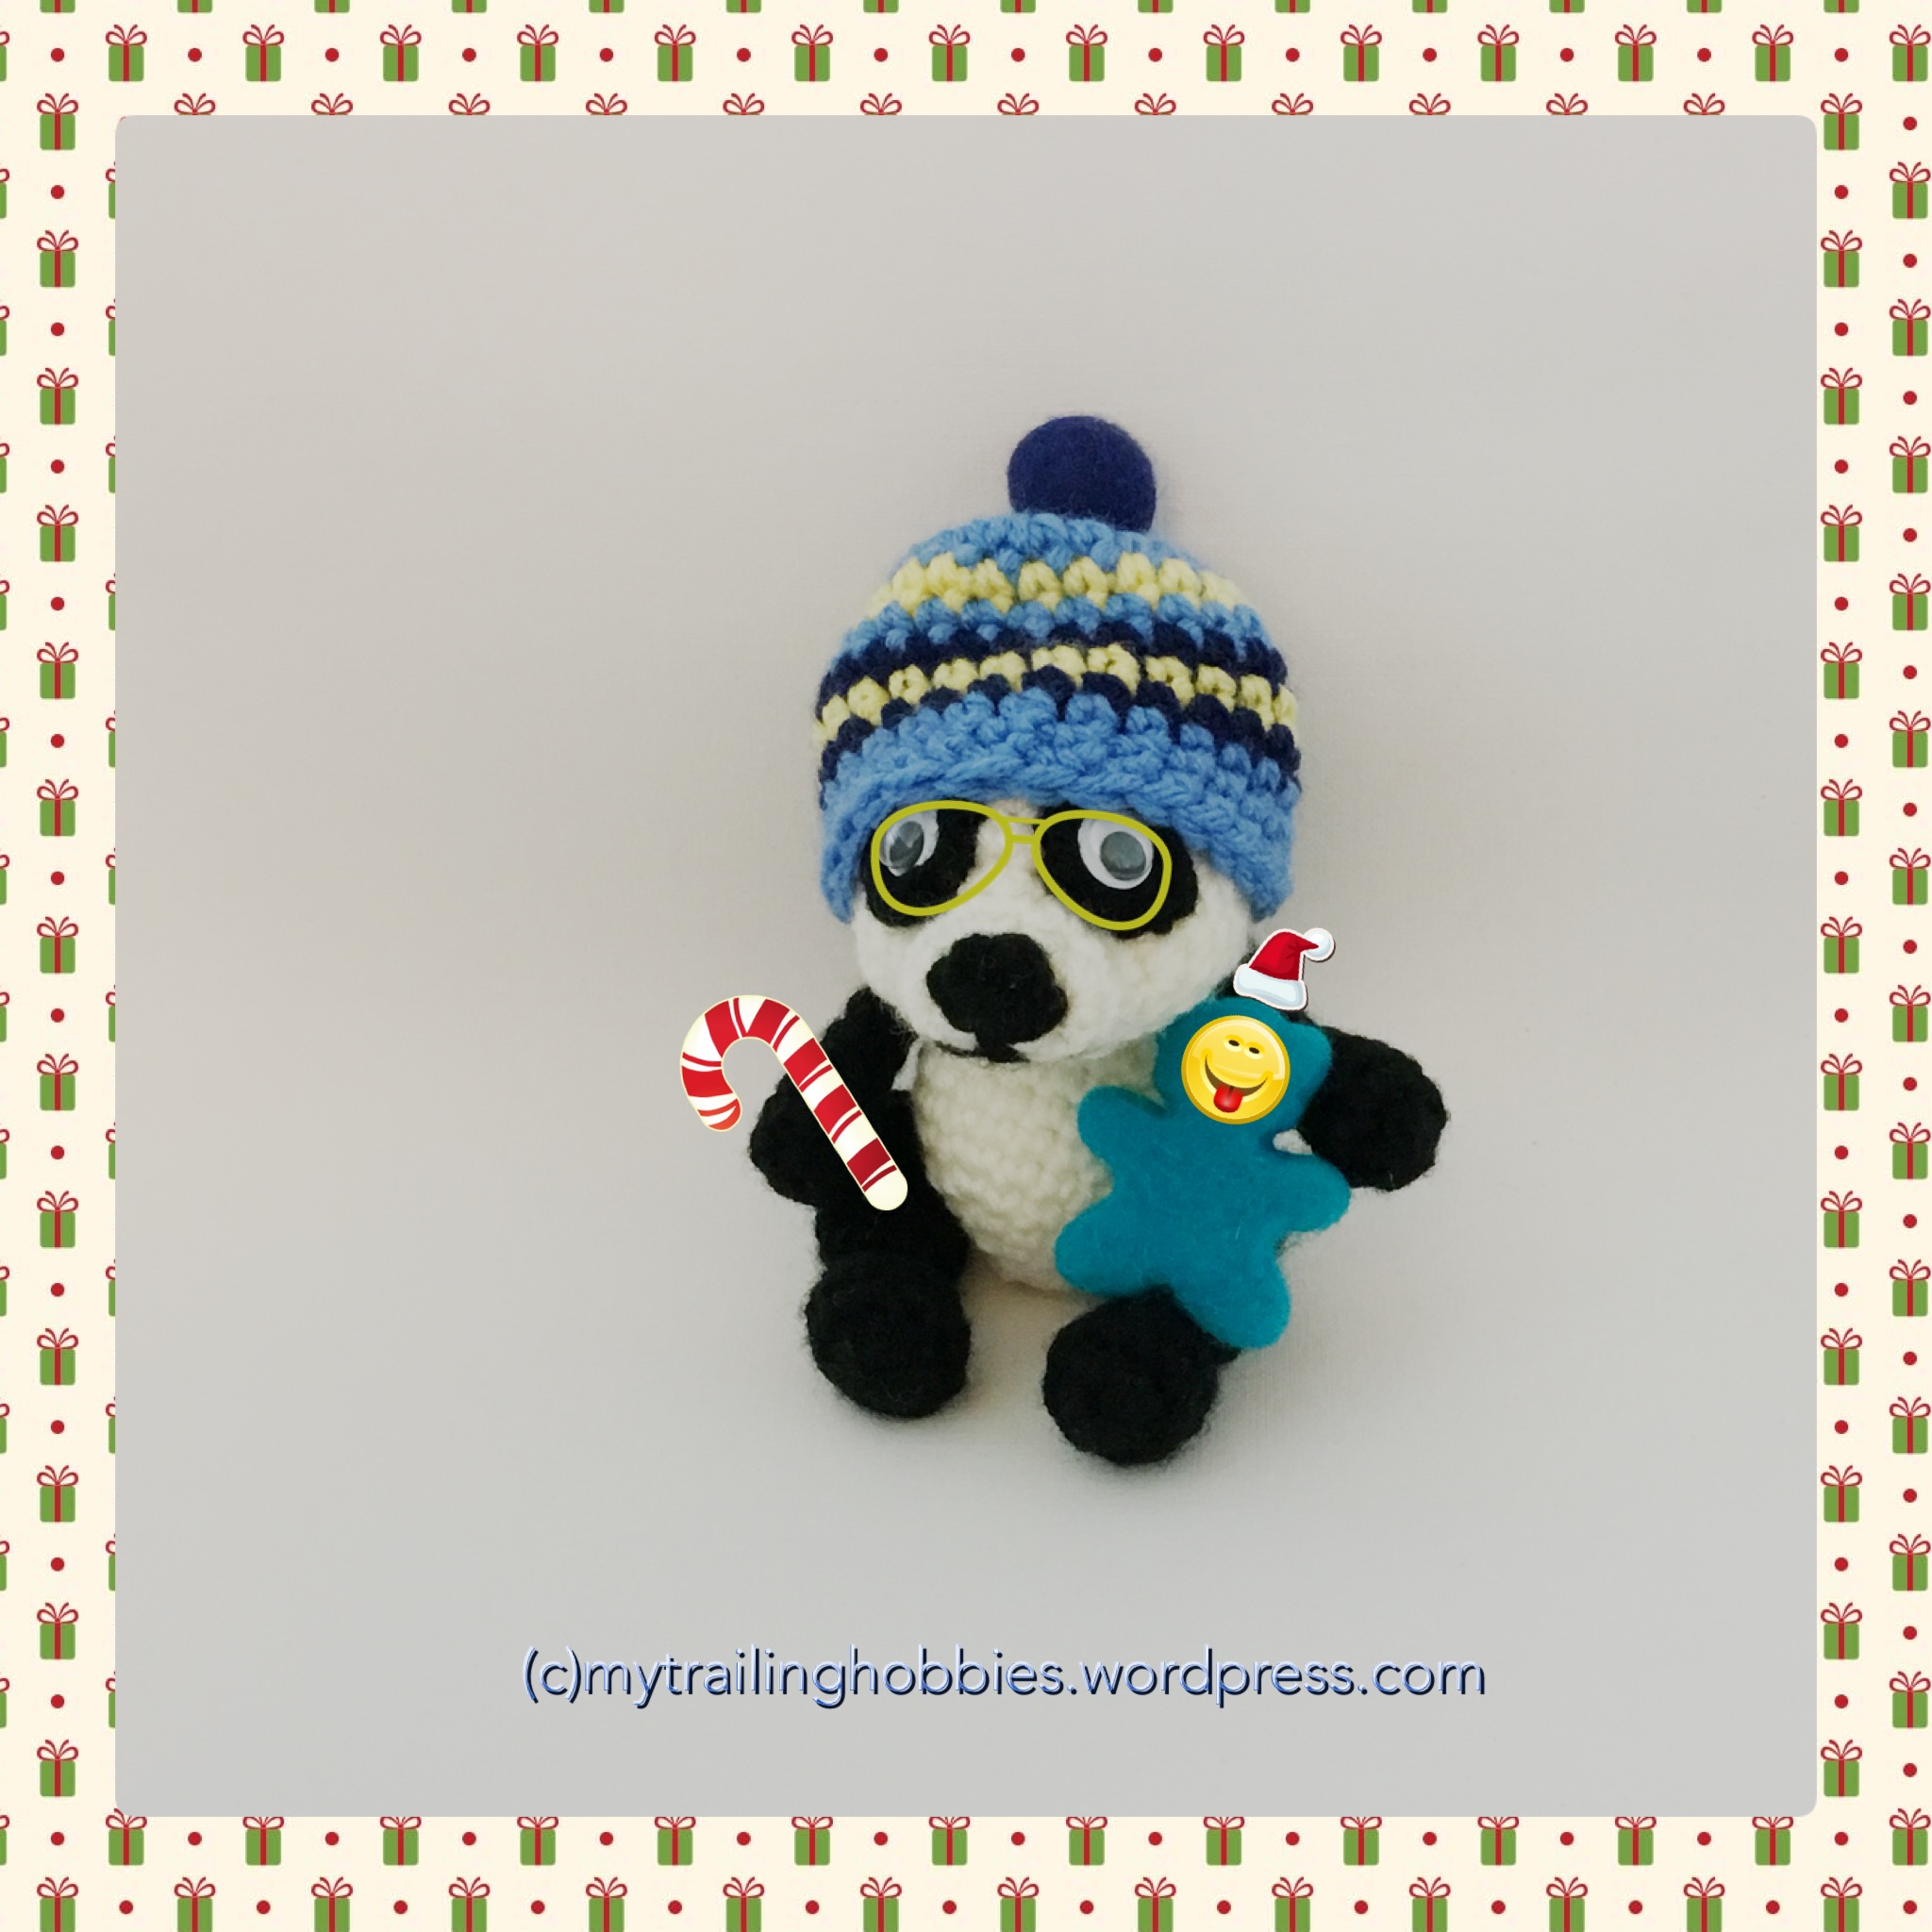
Easy-peasy hat pattern: color A: rnd1 – MC, sc 6 in MC, join, ch1; rnd 2 – scinc in each sc (12sts), join, ch1; rnd 3 – (sc, scinc) across (18sts), join, ch1; rnd 3 – (2sc, scinc) across (24sts), join; color B: rnd 4 – ch1; sc across, join; repeat rnd 4 in desired colors a few times. fasten off, weave in ends.
Don’t forget the Christmas Tree!!!
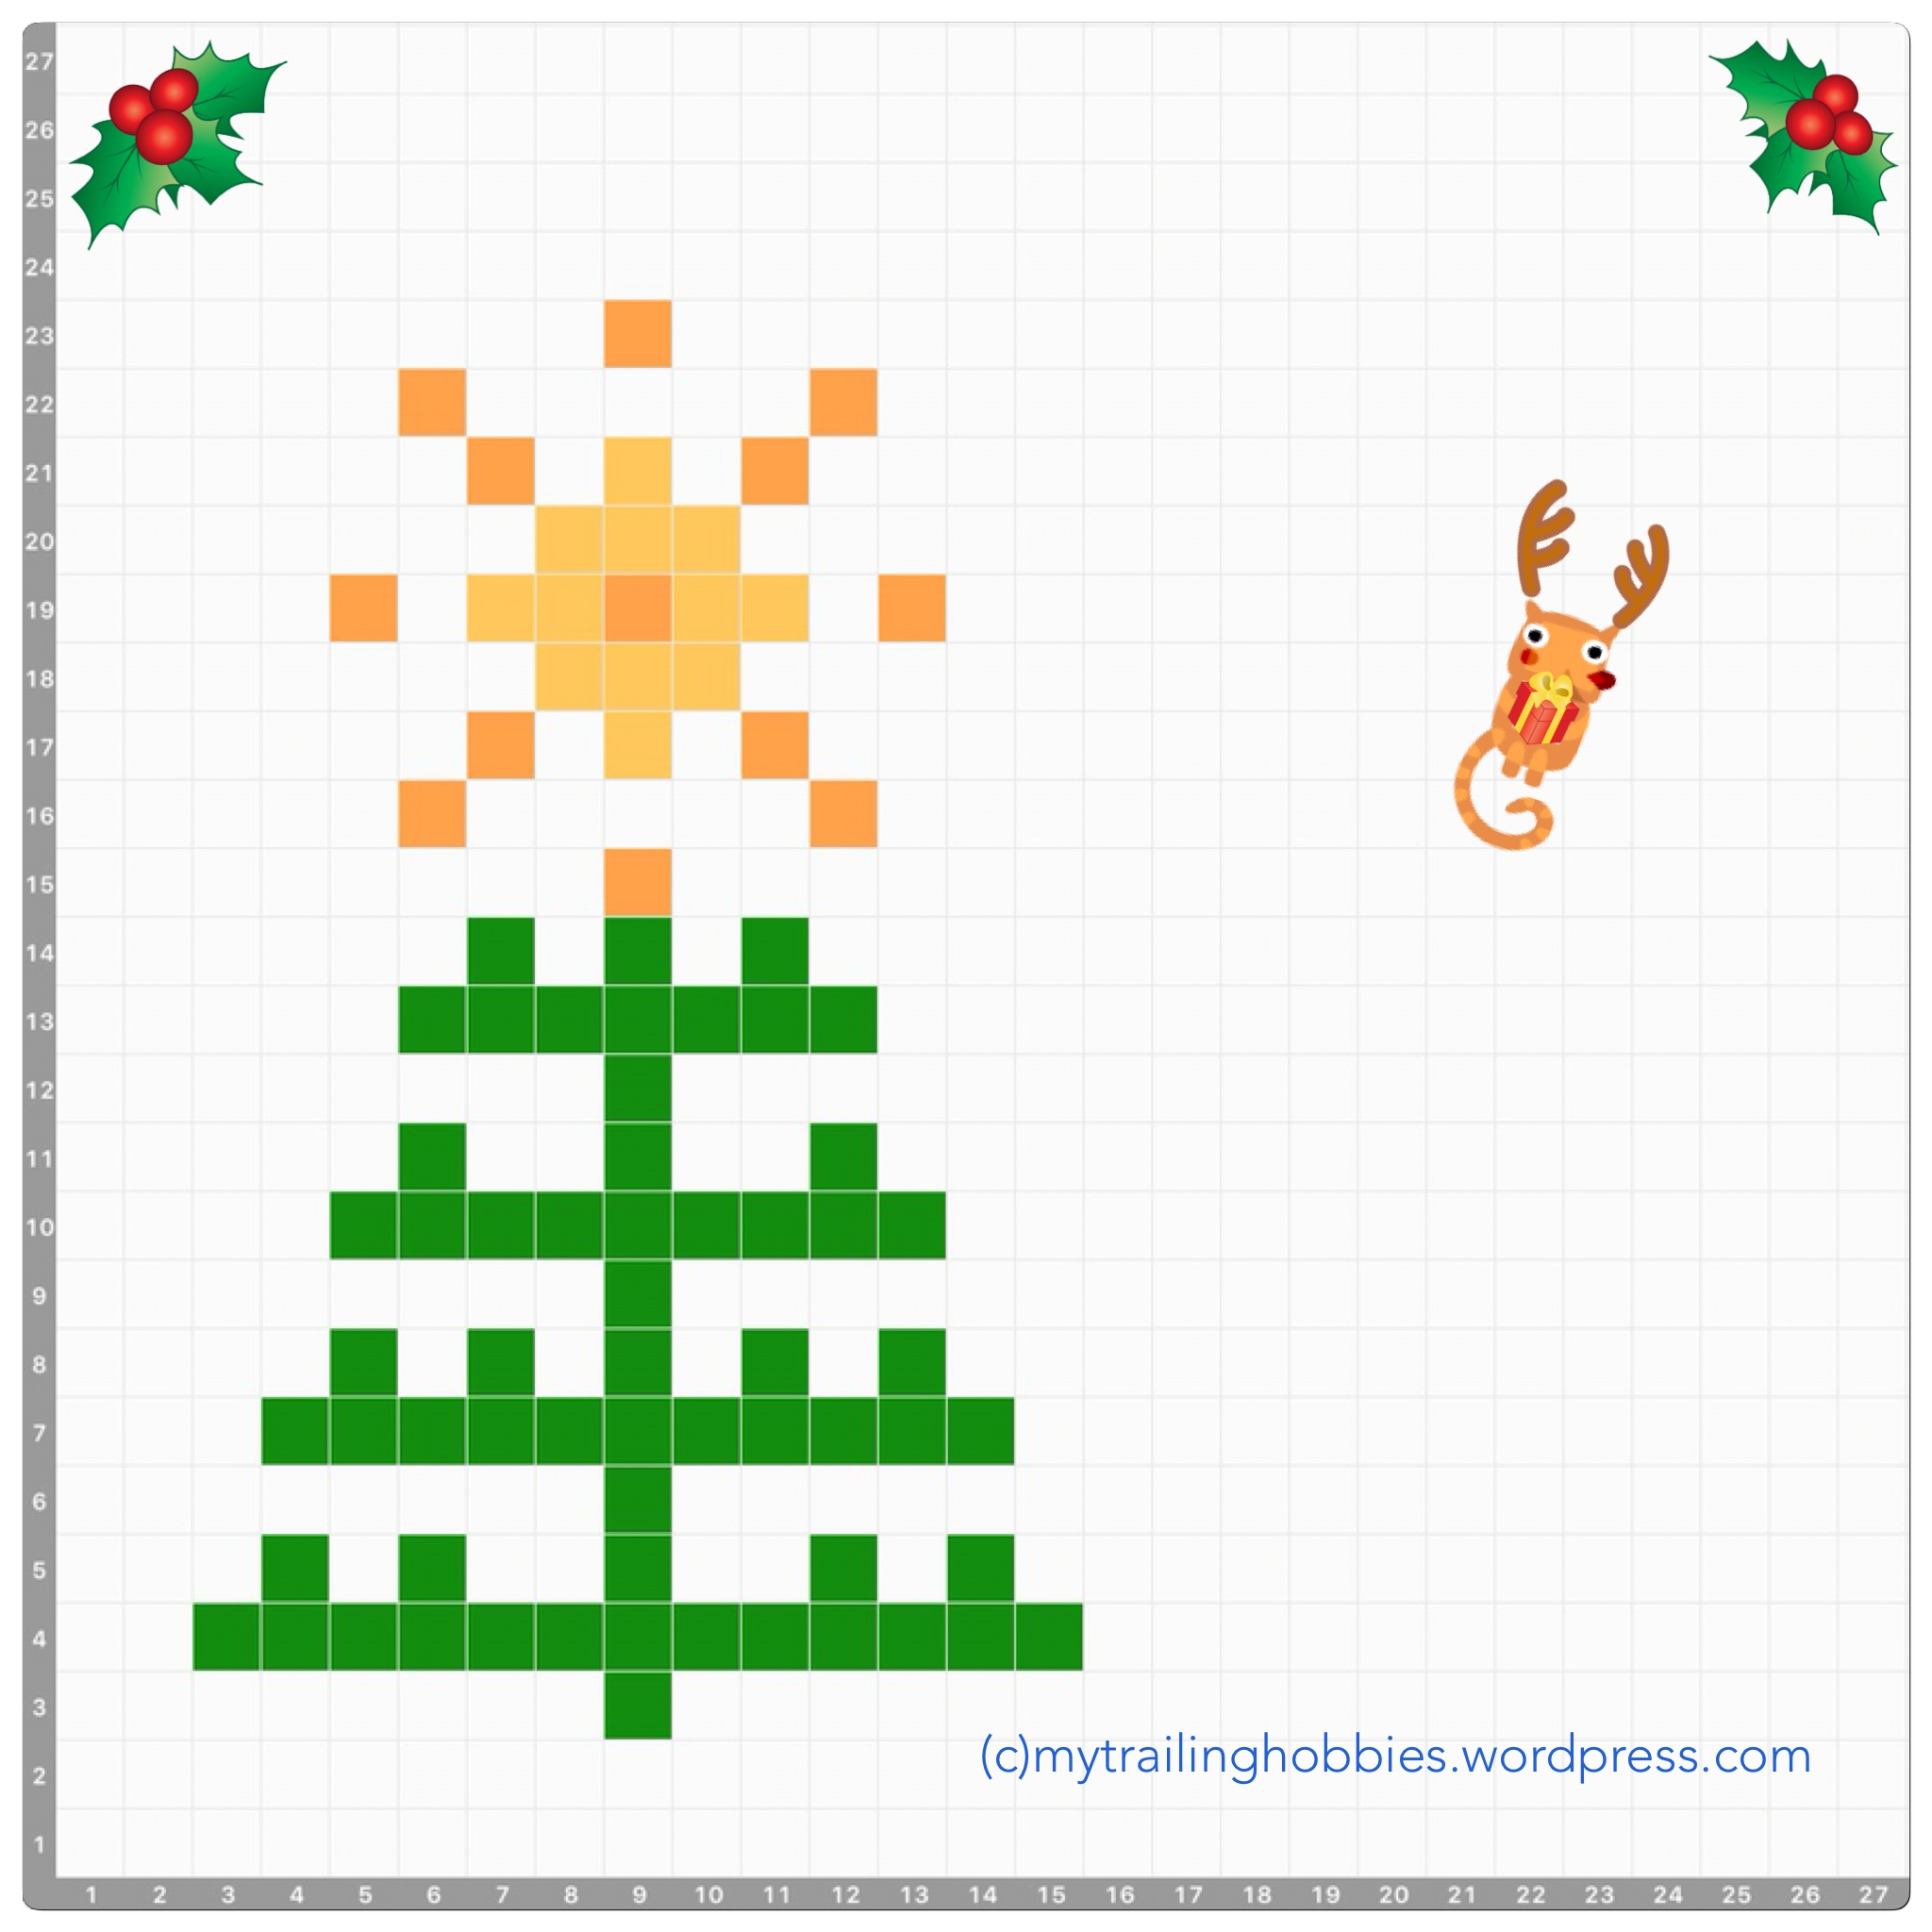

I decided to place all 5 thingies in one doc – now you can download a pdf containing all 5 patterns: Snowballs and Icicles in Color | Free Crochet Pattern | 1-5
Cheers 🙂

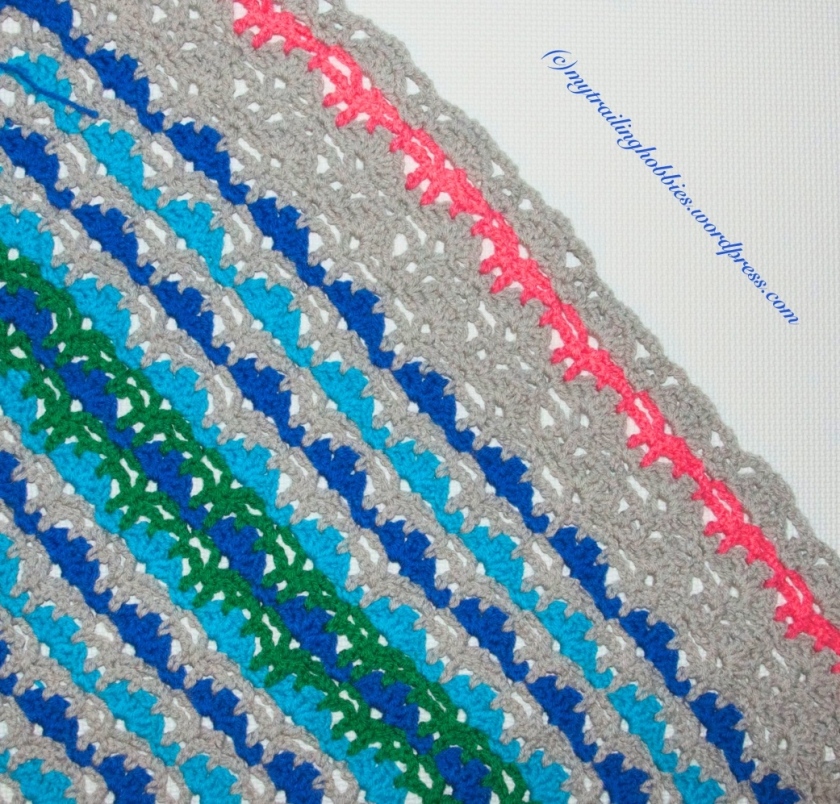
Early this year, I made myself a bulky infinity scarf, but only got to wear it once or twice as it was way too big and warm for the weather 🙂 Now, it’s time to get it back out – yeeey! And…SuperScarf is trending this season!!! 🙂 So here is my SuperScarf 2016:


It’s a mix of merino and shetland wool with some acrylic. It weighs 1.15lbs 🙂 So it’s nice and soft and warm and a tiny bit heavyish. The pattern is very simple – chain a multiple of 2 for a desired width, plus 1 plus 4 for foundation; row 1 (starting in chain 5 from hook), and each following odd row – work crossed dc stitches (no chains in between) across, dc in last stitch, ch 1, turn. Even rows: sc across, chain 3, turn. When desired length achieved – join (sew/crochet) ends together and you have an infinity scarf!
Yesterday, I made myself a funky little Tunisian + Classic Crochet Cowl, which is very light-weight and tiny compared to the SuperScarf 🙂 Tunisian stitching makes it pretty thick and elastic, but not too stretchy, so it keeps its shape well.


In case it might be of interest to you 🙂 it includes a combination of 8 different Tunisian Crochet basic stitches, 10 rows each, a decorative join [not skipping any stitches along edges, left end – sc, ch2, (right end – sc, sc, ch2, left end – sc, sc, ch2), repeat from ( across, sc at end of join], a decorative surface stitch along the join, and a border along the top and bottom of the cowl – mini shells and linked flowers.
And here’s my Petit Cowl, an airy and lacy piece, the tiniest of the three. I am yet to finish the matching wrist warmers:


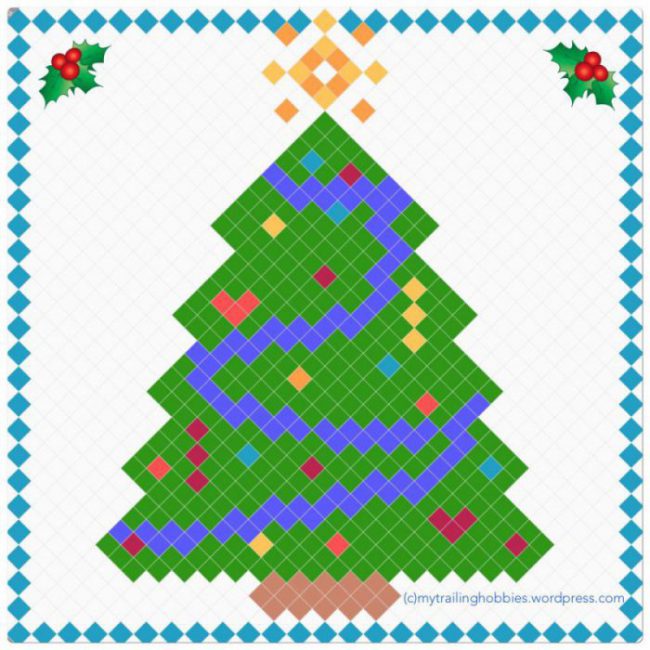
Next, I’ve made a Tapestry Crochet Coaster; it’s virtually reversible! If you weave in the ends nicely, you can use the coaster either side facing up 🙂


You can try making one too. The border with picots and ch3s in the pattern below, may not be very clear, as the awesome app I used to chart it wouldn’t let me be more precise, but it will give you a general idea of the elements used to complete it.
I’ll try making it in Tunisian Crochet next, making the “red cells” within the tree in different colors, like multicolor ornaments, for a decorated tree effect.
Lastly, here’s an idea for a Tunisian Crochet Snowflake Coaster 🙂 and a SC+CH Duo Swirl Ornament:


Cheers!


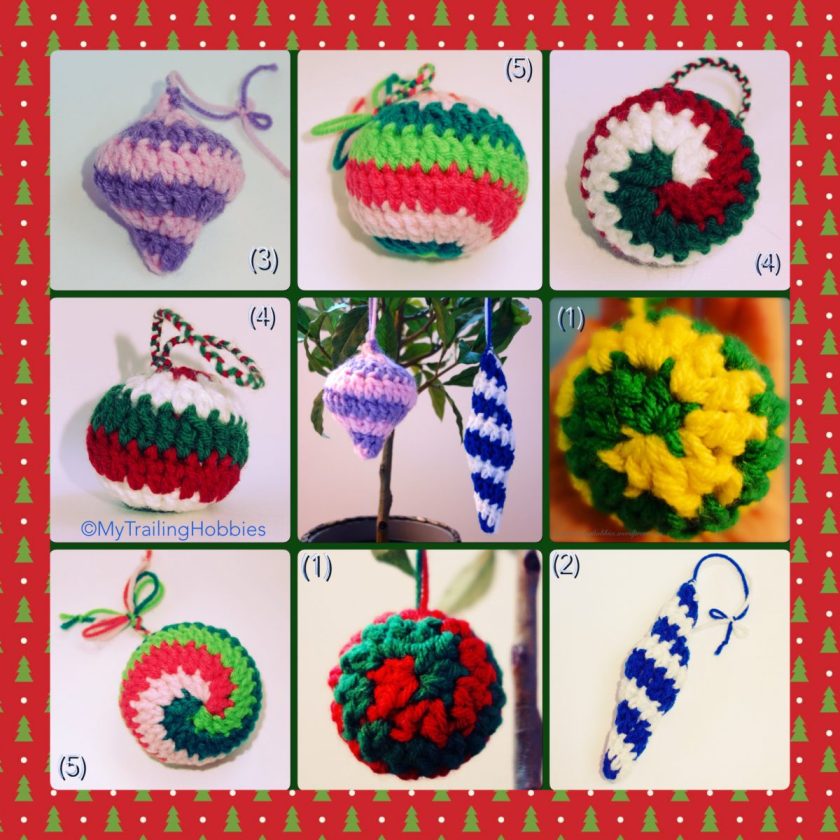
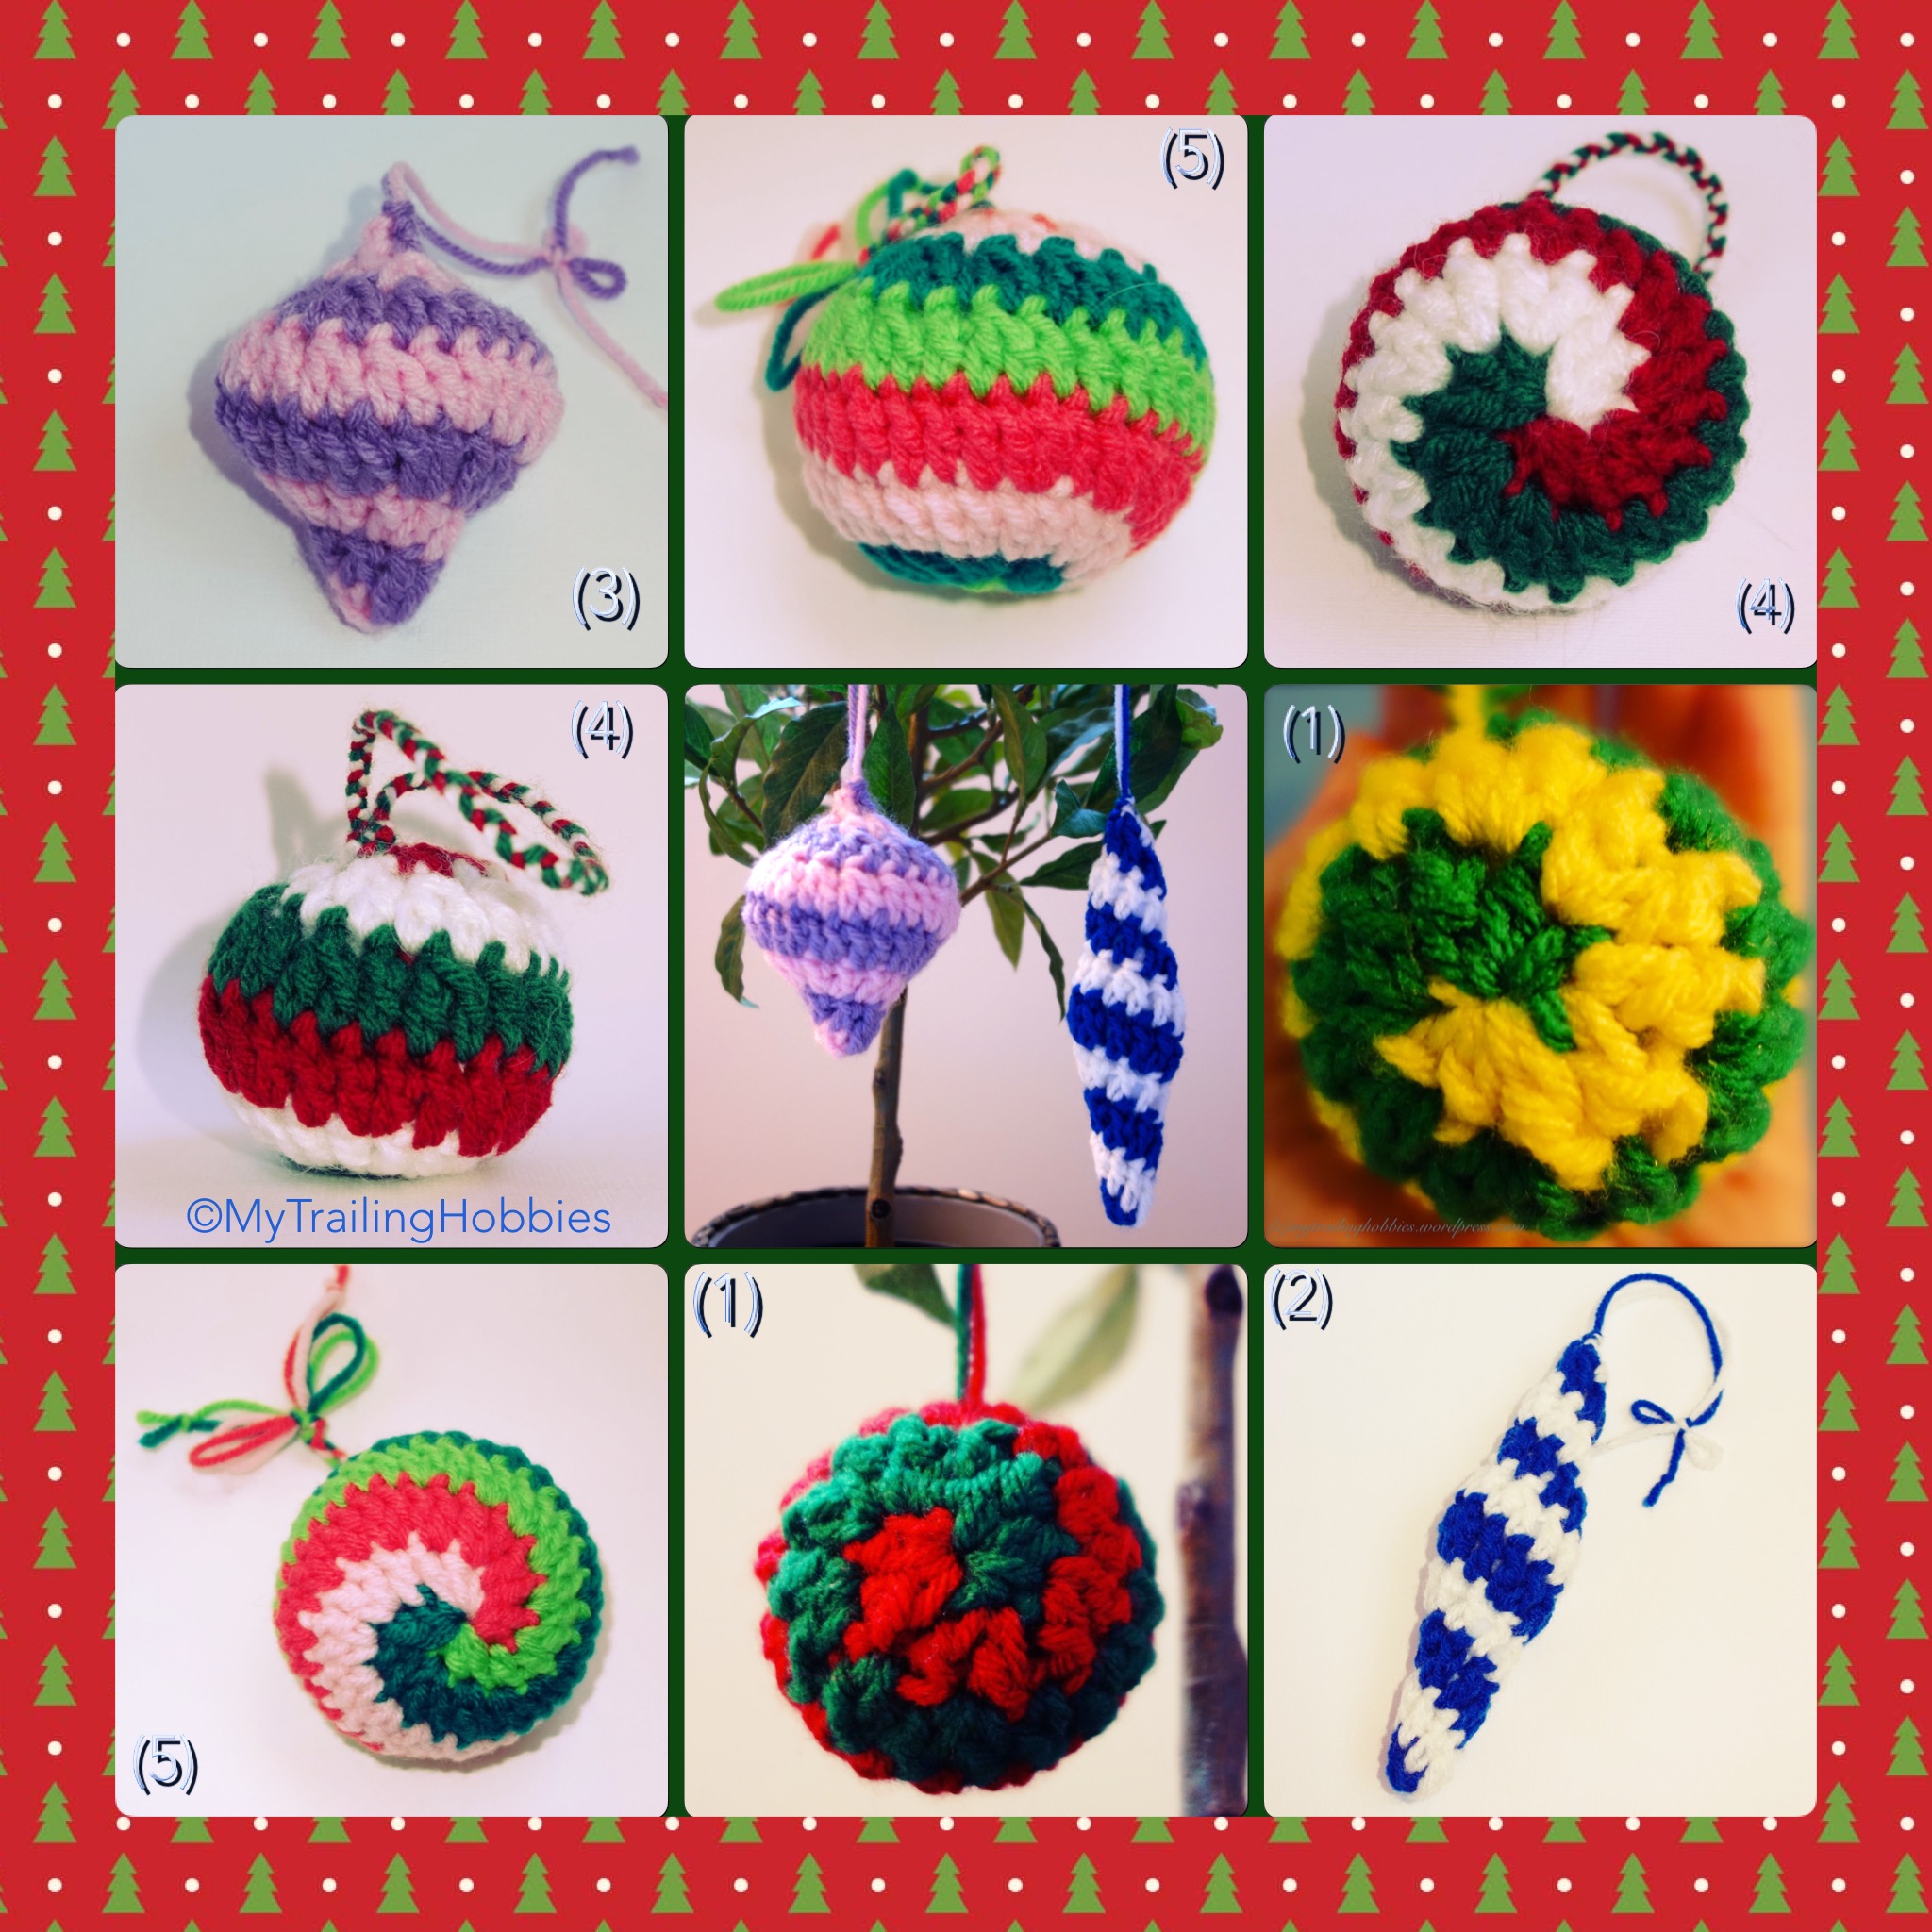
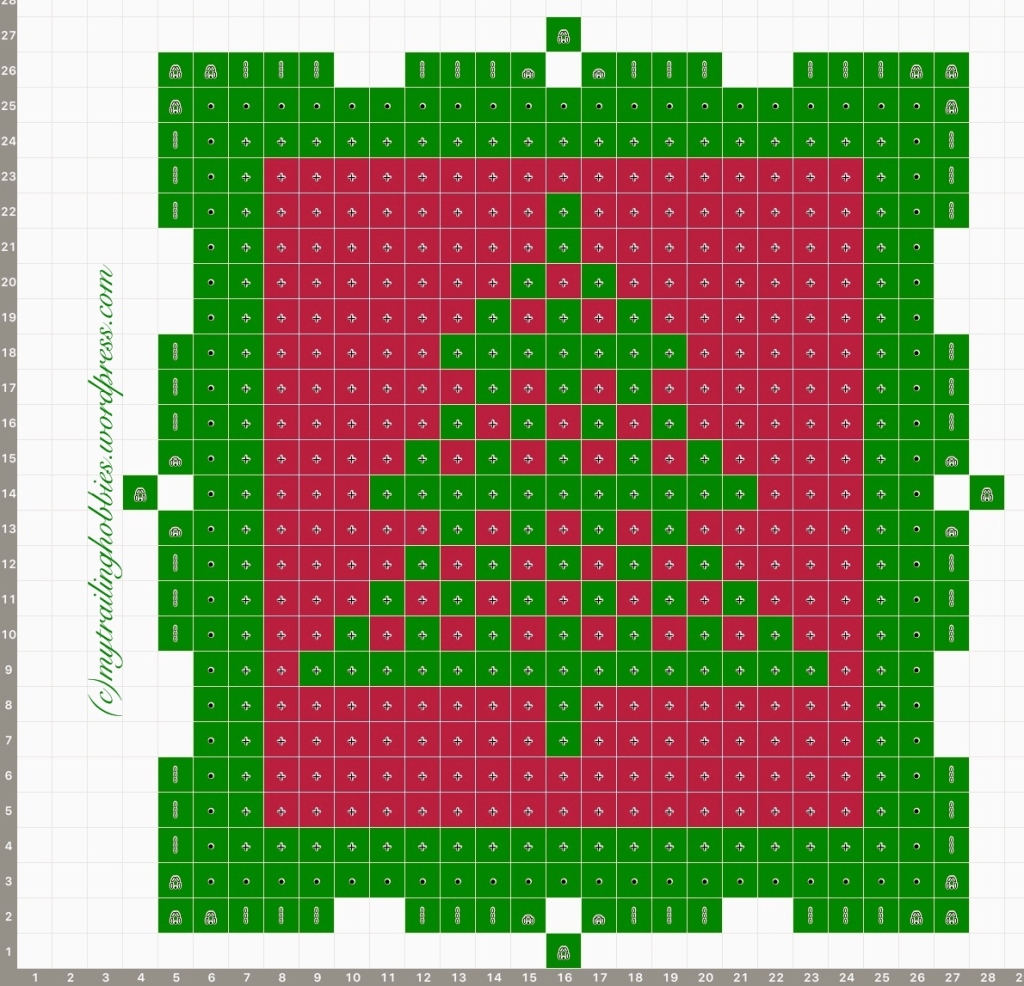
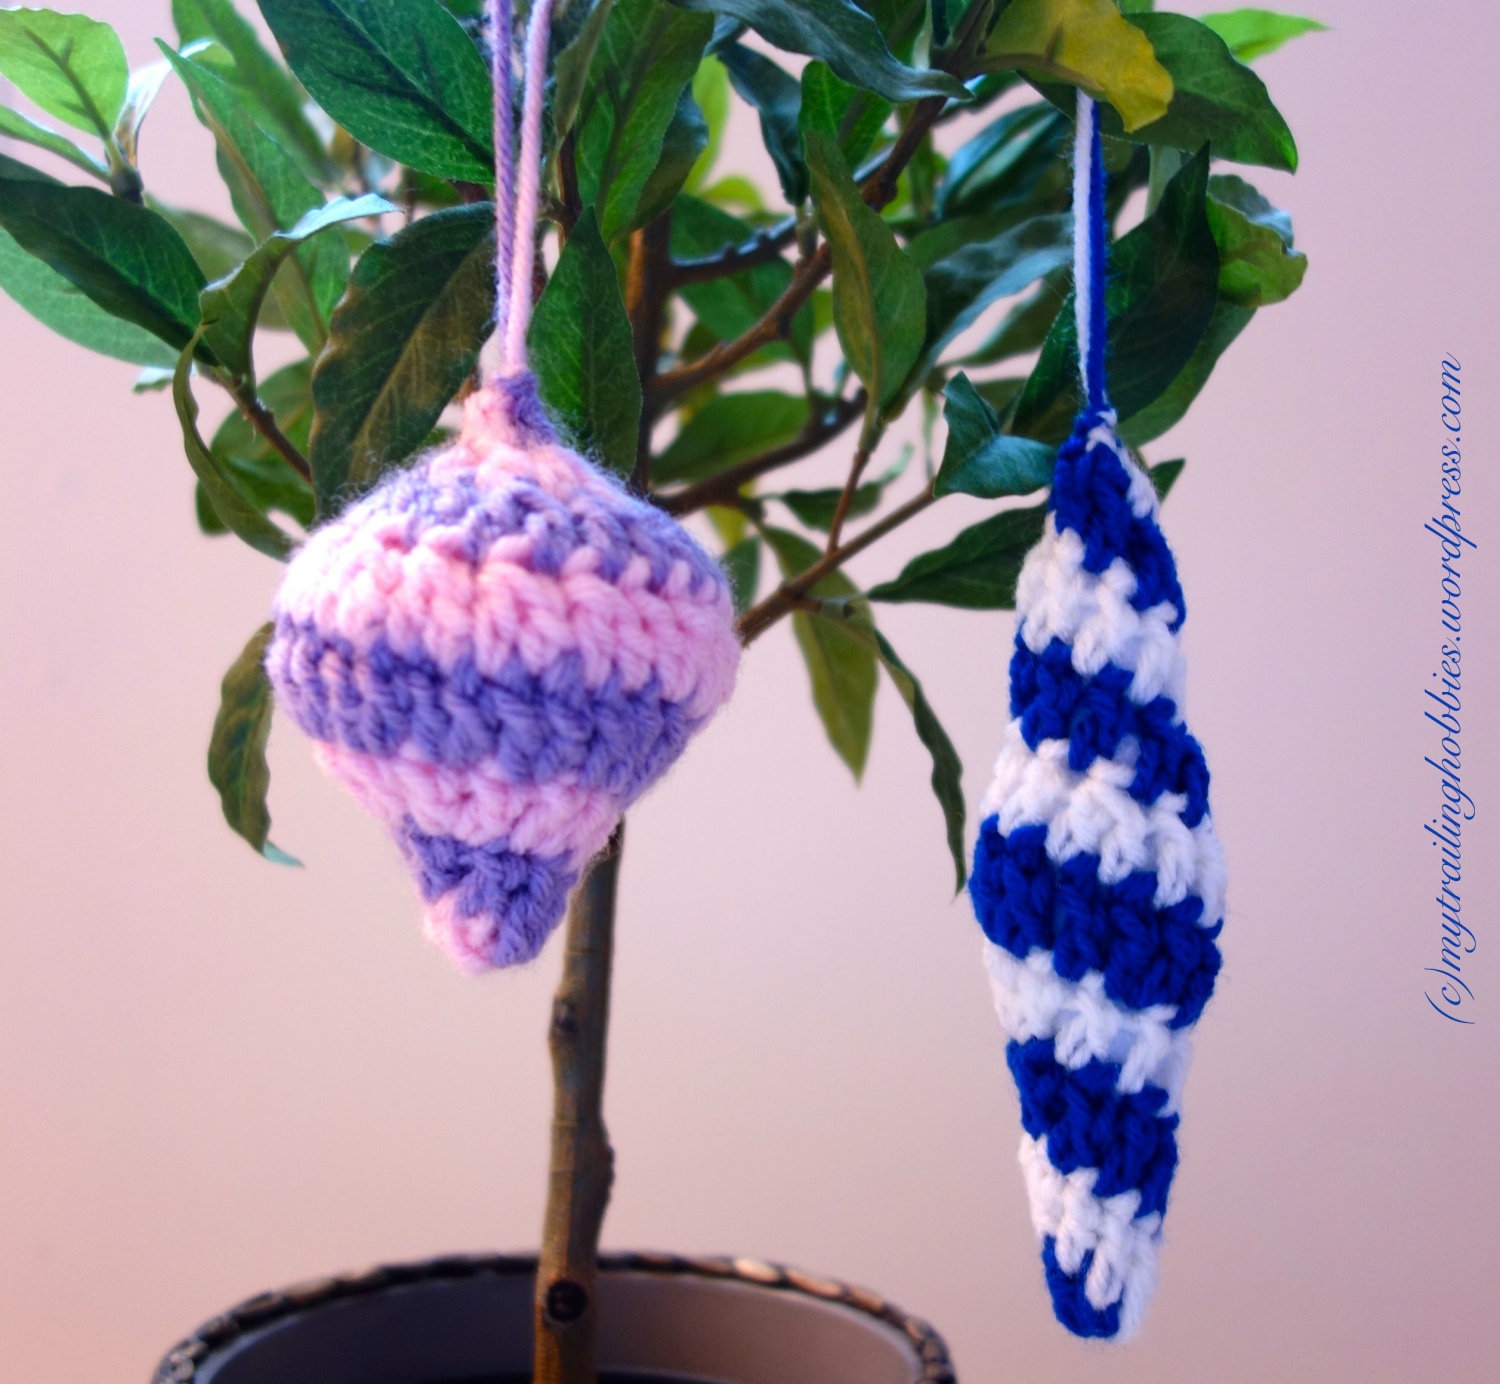
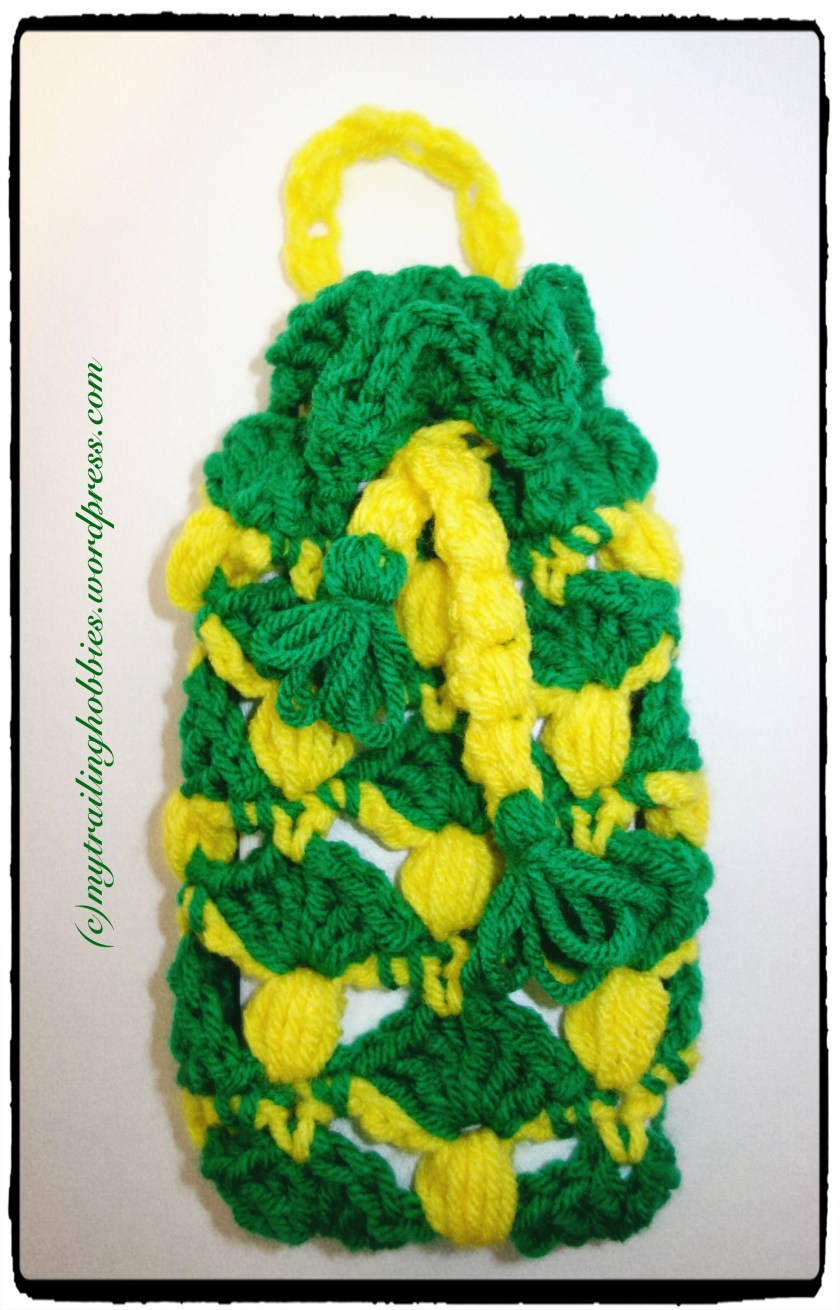
Is it winter yet? Well, I know we’re not there yet, but, it’s never too early to make some colored snowballs and icicles for the season. That’s exactly what I’ve been doing…
I’ve crocheted a few swirly and twirly snowballs and icicles – little colorful ornaments that are safe to have around kids and pets, with adult supervision, of course 🙂


If you’d like to make yourself some of these, you are welcome to check out my written pattern for a Duo Swirl Snowball (see green&yellow and green&red below) and a Duo Swirl Icicle (see white&blue below) here: Snowballs and Icicles in Color – Crochet Patterns-1-2 🙂


With practice, you’ll see that the principle, or technique, described in the pattern will also apply when you make a trio or a quartet swirl.
Here’s a quick pattern for the ornament on the left (pink&lavender), which is not included in the pdf:
MC. Sc, hdc, dc, in MC; dc x 3; dcinc x 12; dcdec x 13; sc; complete in both colors (the pdf above contains a step-by-step breakdown of the dual color swirl work principle); make a loop; fasten off.
Lastly, try making some Trio and Quartet Swirls (see photos above) too with these easy-peasy patterns:
Trio: MC. Sc, hdc, dc, in MC; dcinc x 3; (dc, dcinc) x 3; (dcdec, dc) x 3; dcdec x 3; dc-hdc-sc together; complete in 3 colors; tie and braid the ends; create a loop; fasten off.
Quartet: MC. Sc, hdc, dc, in MC; dc, dcinc; dcinc x 4; dc, dcinc; dc x 8; dcdec, dc; dcdec x 7; sc; complete in 4 colors; tie and braid the ends; create a loop; fasten off.
(US) Crochet term abbreviations: MC – magic circle=magic ring=sliding loop (see video on how to make MC that works for this pattern); sc – single crochet (+); hdc – half double crochet (⊤); dc – double crochet (†); dcinc – 2-stitch double crochet increase (⩝); dcdec – 2-stitch double crochet decrease (⩜); dc-hdc-sc together – a 3-stitch combination decrease.
Cheers!
There’s an update, check it out 🙂

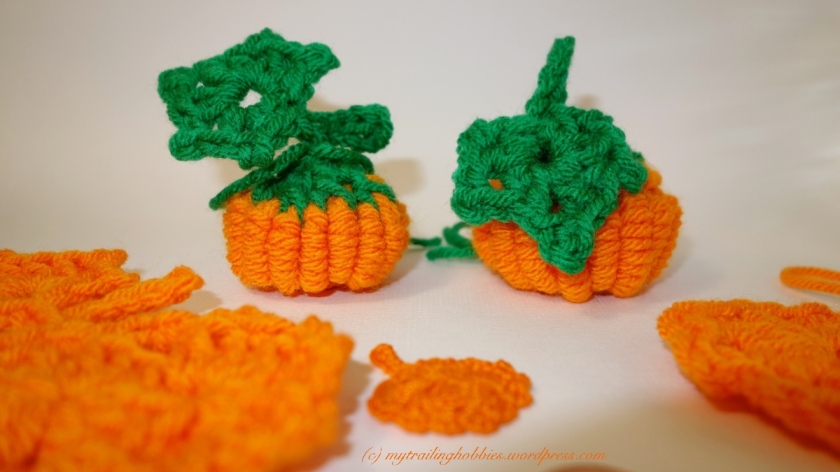
🍁 🍂 ❤️ decking my home with the cutie pumpkins!
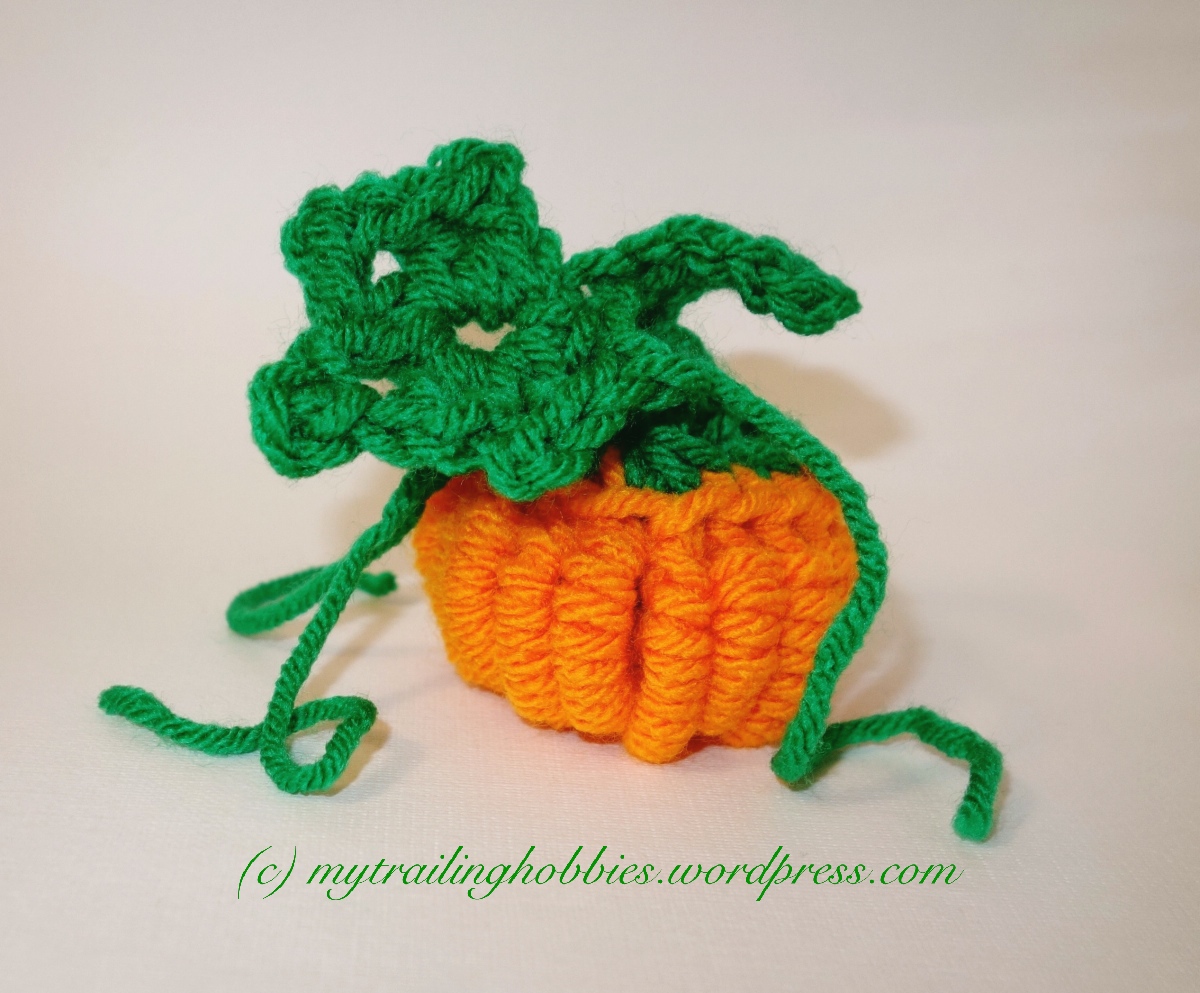
Continue reading “At a Crochet Pumpkin Patch”

Couldn’t wait to share my freshly hooked creation 😀

I’ll share my cute easy-peasy pattern as soon as I get a chance to chart it down ❤

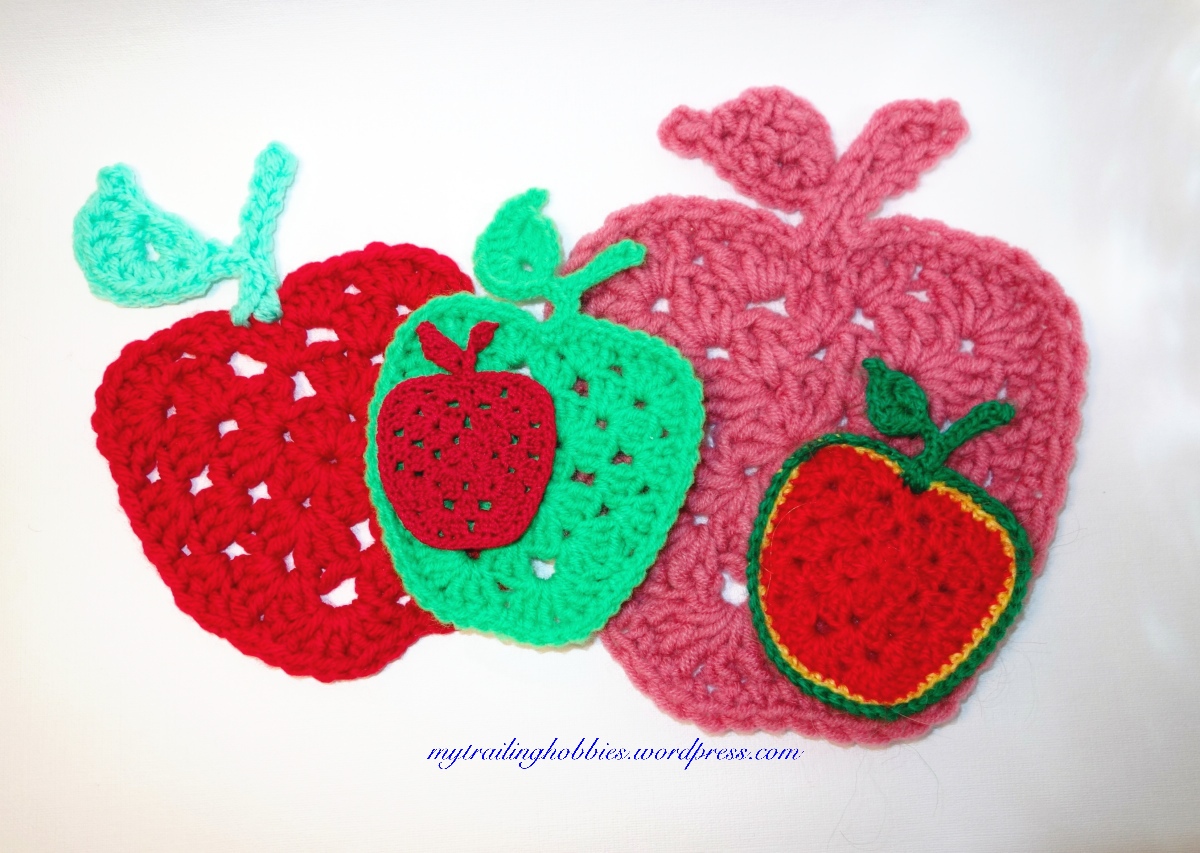
Let me begin by saying: I love apples 🙂 All kinds of apples. Any size, shape, and color. I feel like each time I have an apple, I think of my Grandma and her beautiful yard and garden in which, among other plants and trees, she had several different kinds of apple trees. I think of apple tree blossoms, and the little green and sour miniature apples (yes, my friends and I tried eating those on a number of occasions, most probably because a tiny apple in that stage was too cute not to give it a try), and the fully ripe multi-color fruit, mostly sweet and juicy. My sister, on the other hand, has never been a fan of this particular fruit, sweet or sower…would never have one bite…go figure 🙂
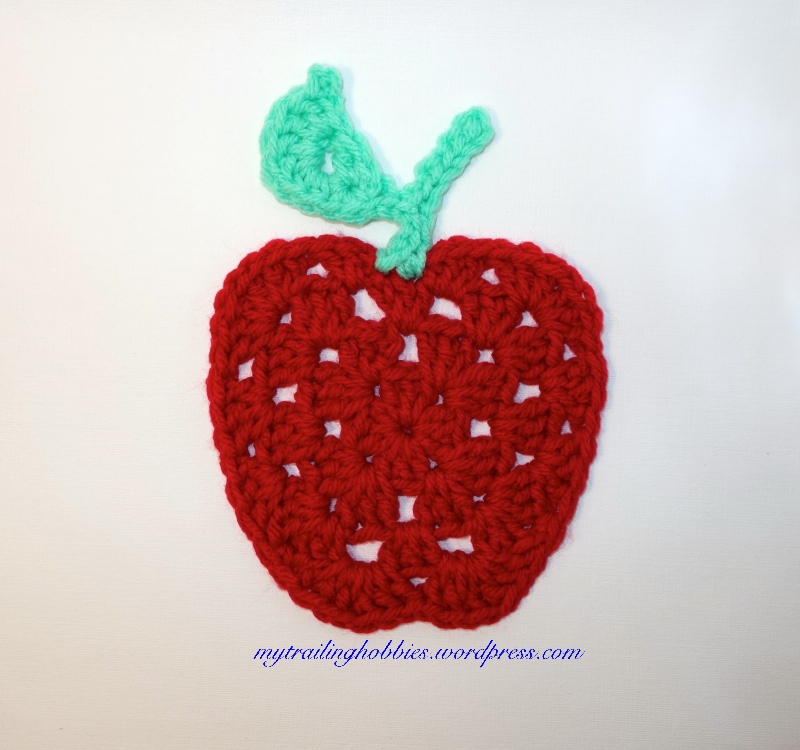
Anyway, I was playing with different shapes, working on my granny-style crochet ‘shapes and colors’ set, when I came up with a granny apple pattern. It came out pretty cute – – and I’ve been using my apples as coasters.
If you’d like to make yourself an apple coaster similar to one of these
you are welcome to use my pattern, which I’ve charted out HERE:
The Granny Apple can also be used as a sensory toy in your playtime with your little one(s).
I’ve experimented with the leaf and stalk shapes and sizes, yarn and thread size, color and pattern border. Try the pattern as is, then, if you wish, play with the placement of build-up chains and/or chains within rounds/rows, e.g. add a chain if you feel like having 2 chains in place of 1 in each corner, add 1 chain where there are none in between corners, or remove the single chains between every 3 DC in the initial round…to obtain your preferred shape. As they say, there is no right or wrong in crochet; there is always a way that works best for you. Cheers!


I’ve made a sample of Bird of Paradise, Frida’s Flowers, in size 10 crochet thread 🙂
It’s worked so well, I’m going to make the rest of the motifs in the blanket project in crochet thread too. I’d like to put together a miniature version of the blanket, but first, I’ll need to see how each motif looks in the size. The free pattern for the blanket can be found here.
The thing is, for a while, I’d been avoiding multi-color projects simply because I didn’t feel like weaving in multiple ends. I’ve always loved colorful crochet pieces and admired the work others produced in beautiful colorways. I just didn’t wish to work with more than just a few colors spaced out at quite large intervals, so it’d be easier to sow in the ends. Then, I came across Edie Eckart’s tip, which I really liked 🙂 In her “Connect the Shapes Crochet Motifs: Creative Techniques for Joining Motifs of All Shapes”, she advises:
“Instead of letting the Fear and Dread of Multiple Ends keep you from using all the colors of yarn you desire, think of the task as just another important step in making the best possible project you can. Consider the satisfaction you get from a just-mown lawn…Take pride in the tidiness and colorfulness of your amazing work!”
“The Fear and Dread of Multiple Ends”! Is that what it is?! 🙂 She pinned down the feelings that, apparently, have been keeping me from taking on patterns more elaborate in terms of color. So, now that I know it’s a fear, I decide to face it to overcome it 🙂 I pick up a bunch of colors and get started. I start small:
Then expand as follows 🙂
The next thing I know, I’m sitting there weaving away, sewing in those multiple colorful ends of the Bird of Paradise motif 🙂 [I found the project info through a blogger, Elzeblaadje, who posted a lovely motif she’s crocheted for her blanket.] I WAYGO-ed 🙂 and it made a huge difference! Weave-in-as-you-go slows the work down in a way, but it really makes the process more efficient.
Look how clean the back of my Frida’s Flower is 🙂
And how do you feel about multi-color projects? 🙂
P.S. I’ve just realized that today is Frida Kahlo’s birthday! The Frida’s Flowers CAL motif designs were inspired by Frida Kahlo. What a coincidence!


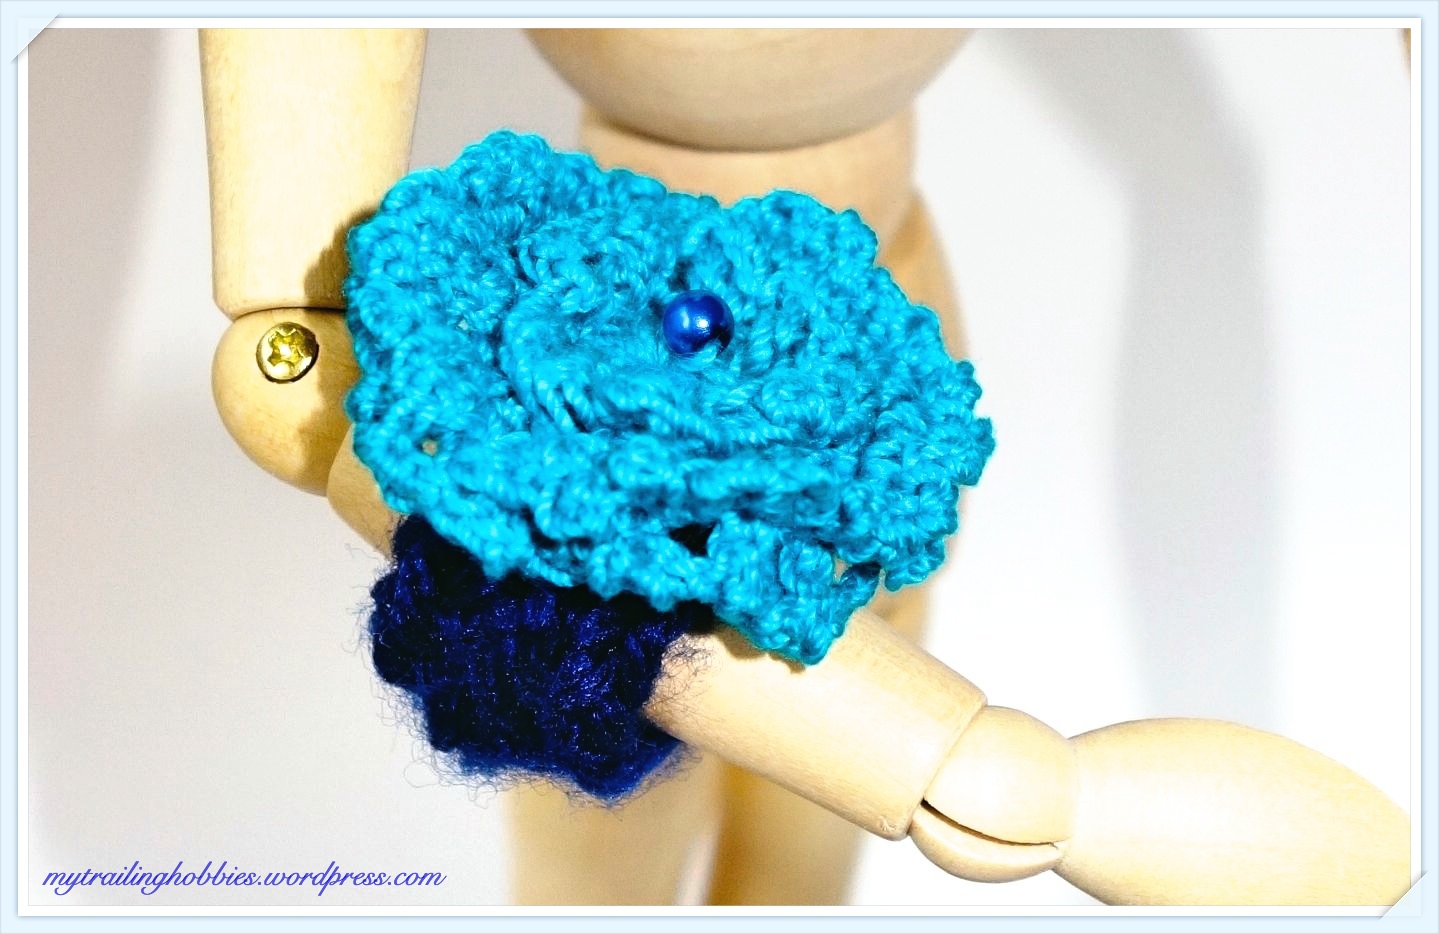
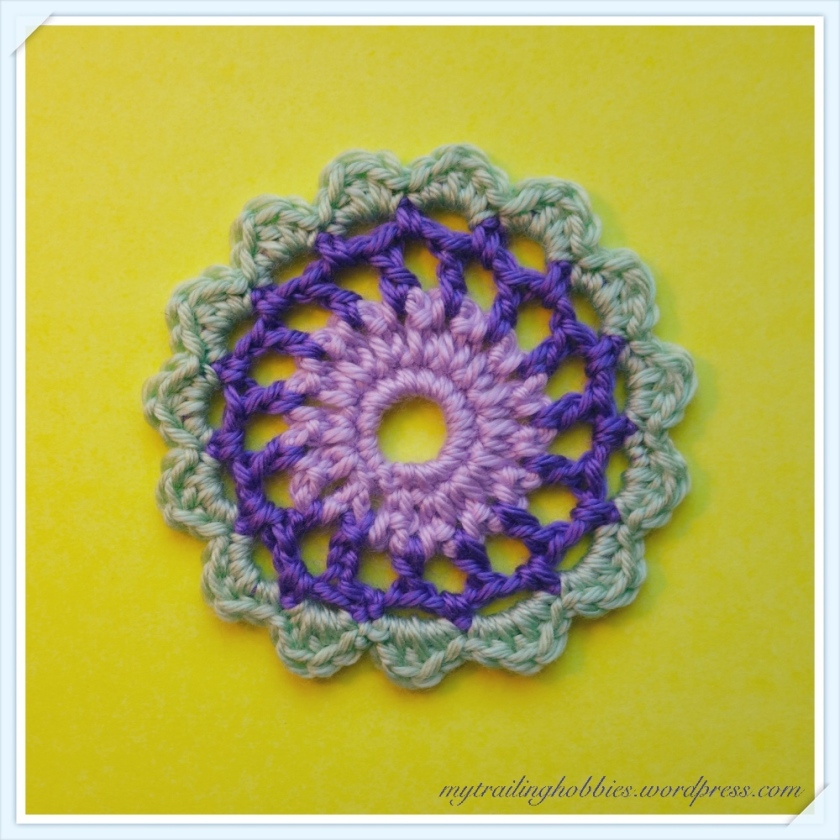
I’ve crocheted myself a new little ring. The flower pattern incorporates elements of a circle pattern by Edie Eckman. Last week, I discovered E. Eckman’s work for myself, thanks to a post by MrMaxwellMakes and the WordPress that makes it possible for creative folks to connect and share info and ideas. Her math approach to crocheting is so in synch with how I’ve been looking at it. I looked at a few books of hers and came to a conclusion: I love her work! 🙂
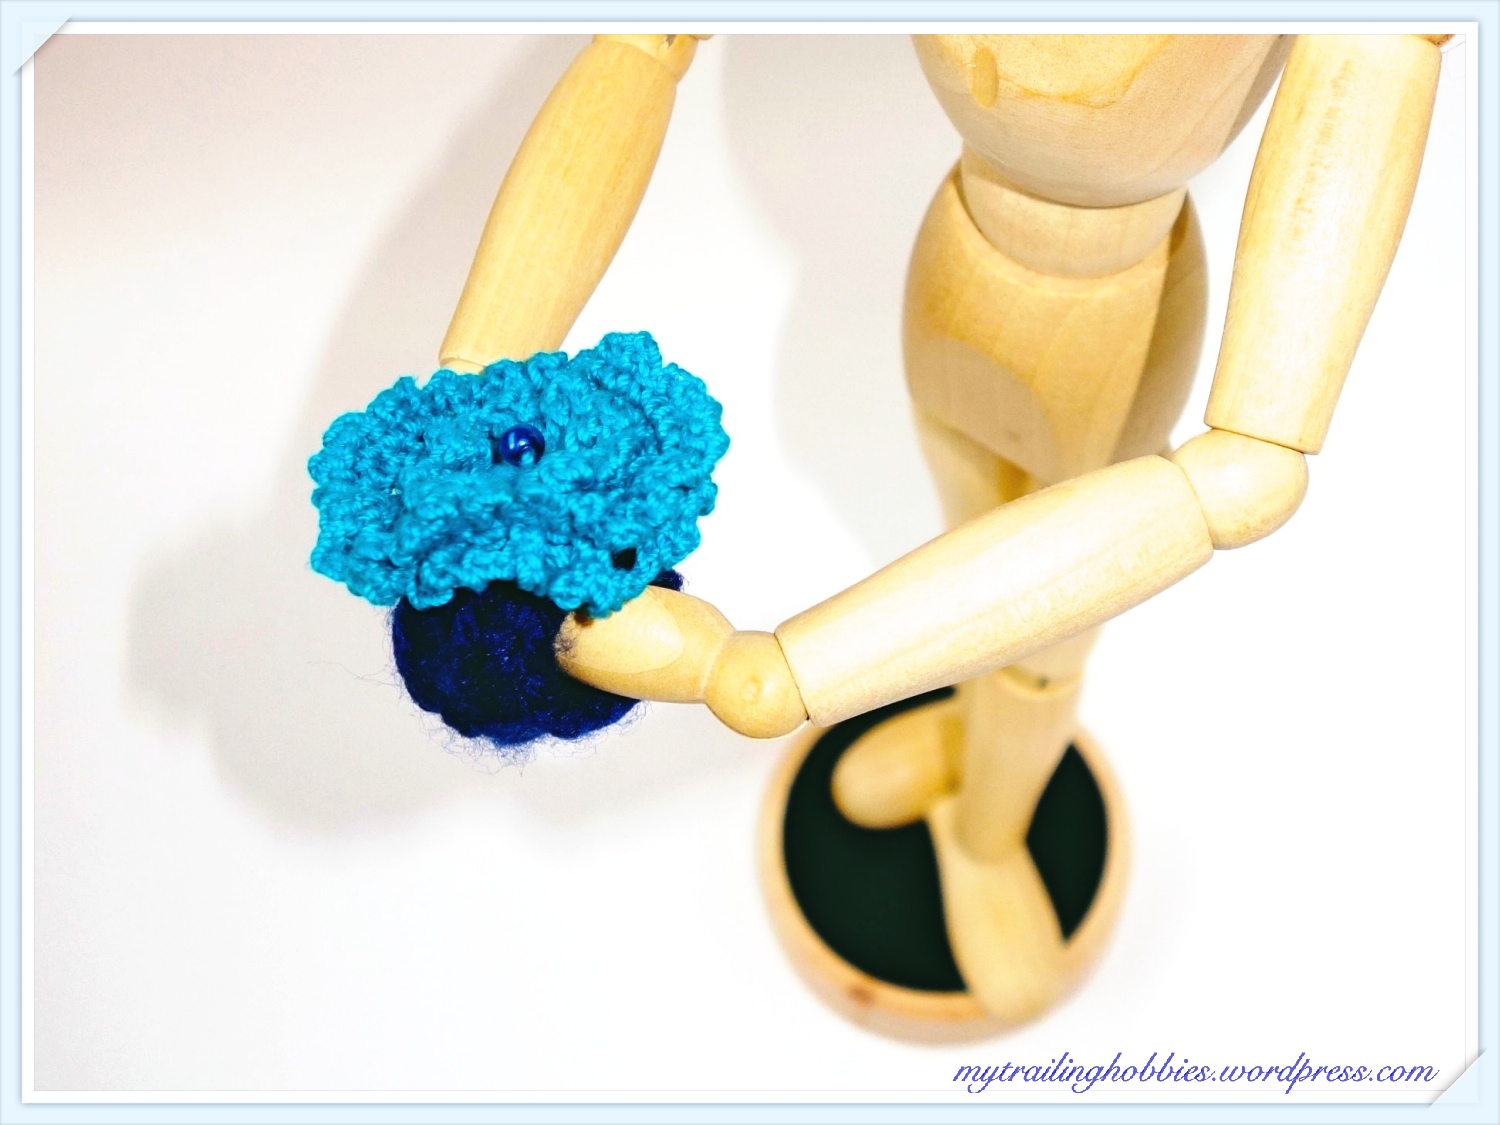
Wearing blue today feels so right 🙂

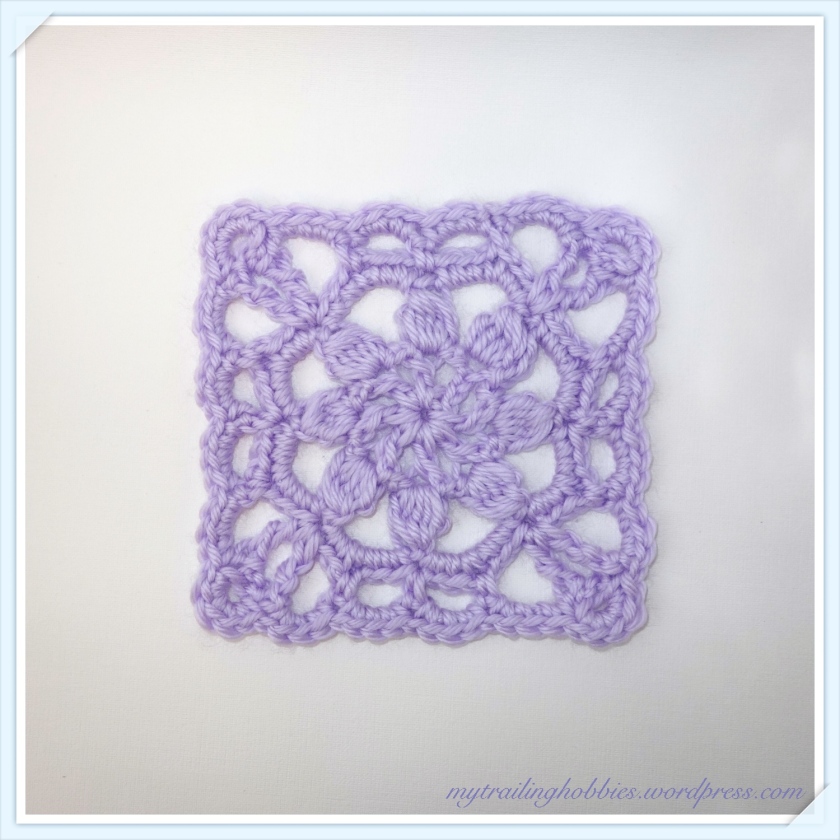
Today, I’m starting a new project “A Motif a Week”. The following square motif is going to be my Square One 🙂
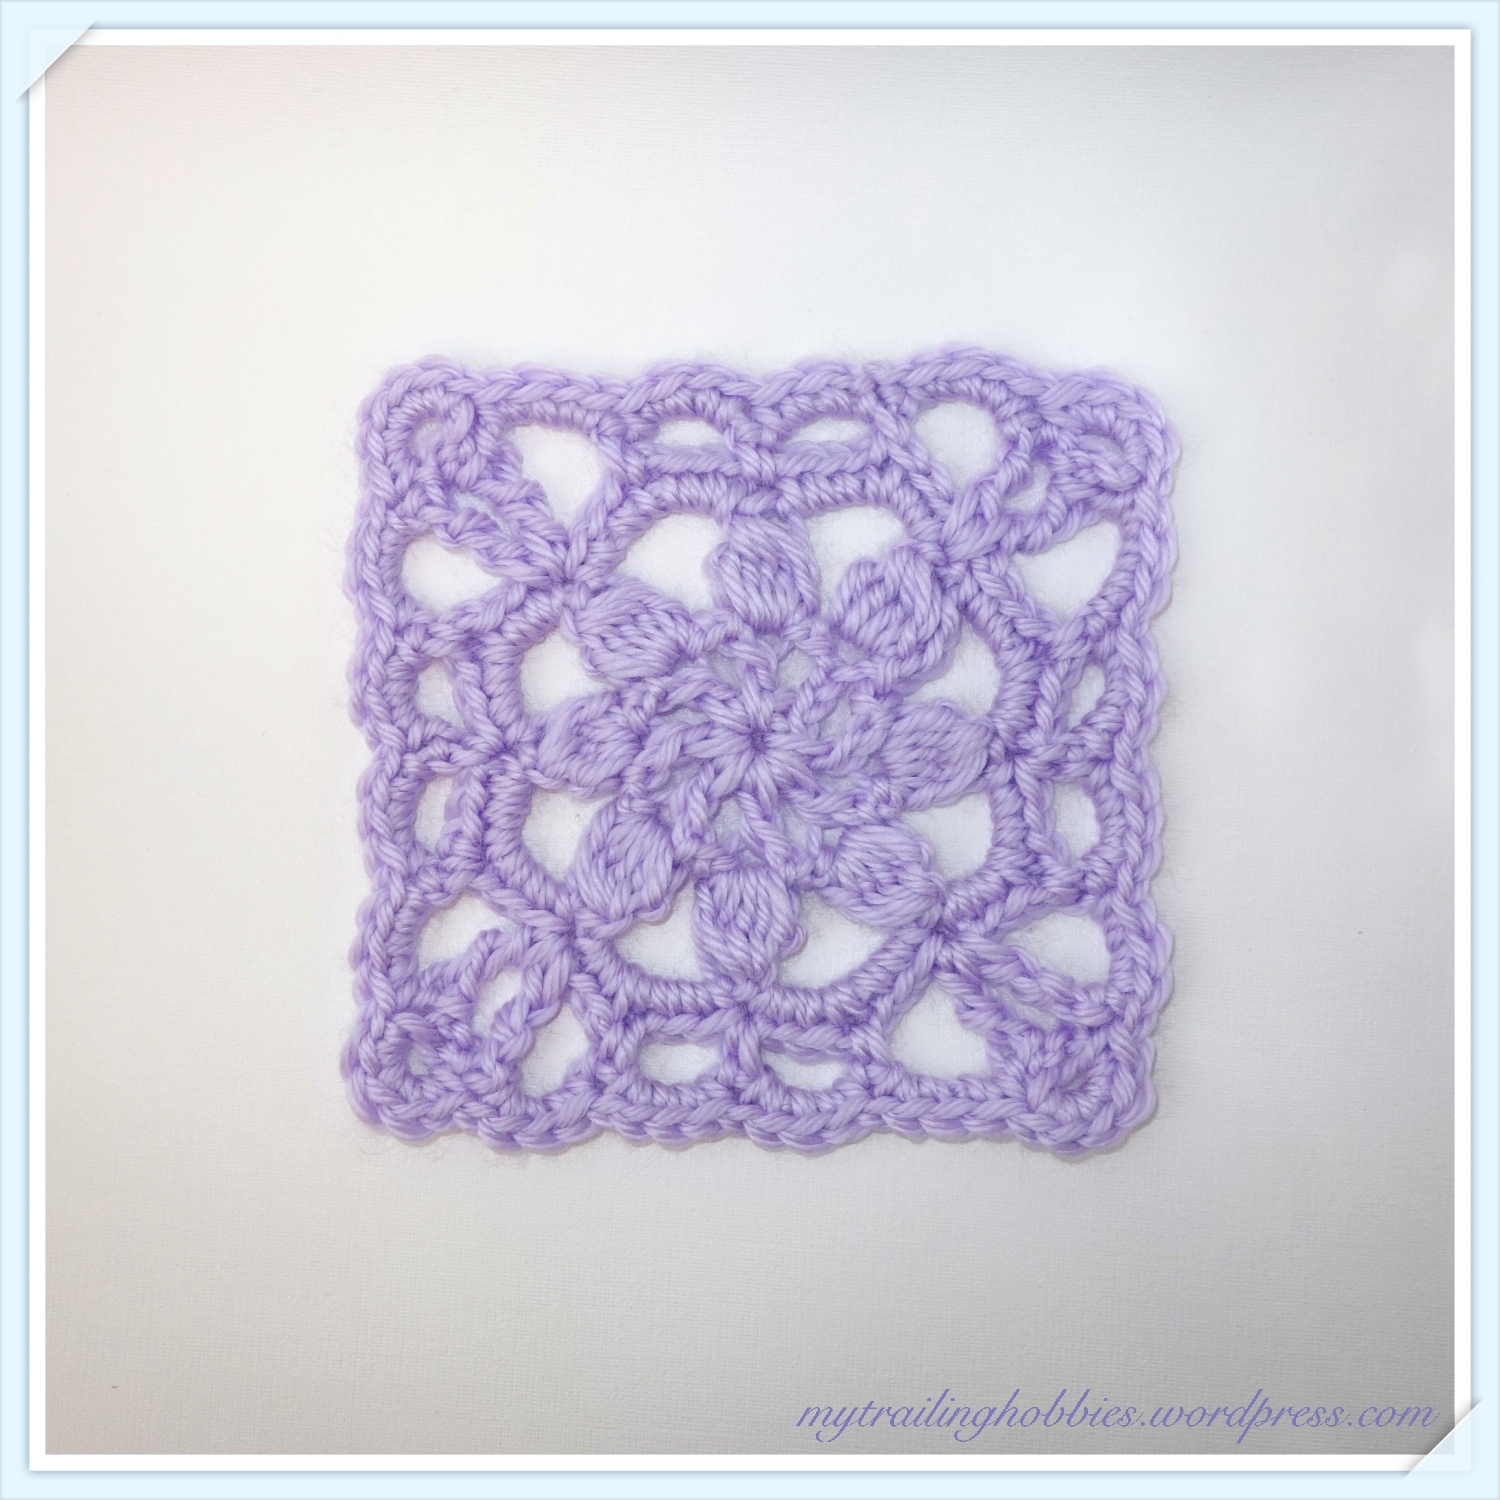
The motif was designed for crochet thread #10. I, however, love the magnified version in weightier yarn. I do enjoy delicate lace crochet pieces. I just think the same design can be made in a variety of sizes, each beautiful in its own way 🙂
Once a week, I’ll take a motif, in random order, from one of my two go-to crochet motif books displayed herein and make it in a couple of different sizes of varying color composition. I’ll use crochet thread #10 with 1.5-1.75 mm crochet hooks and yarn with 3.5-6.00 mm crochet hooks. I’ll post the results on Thursdays.
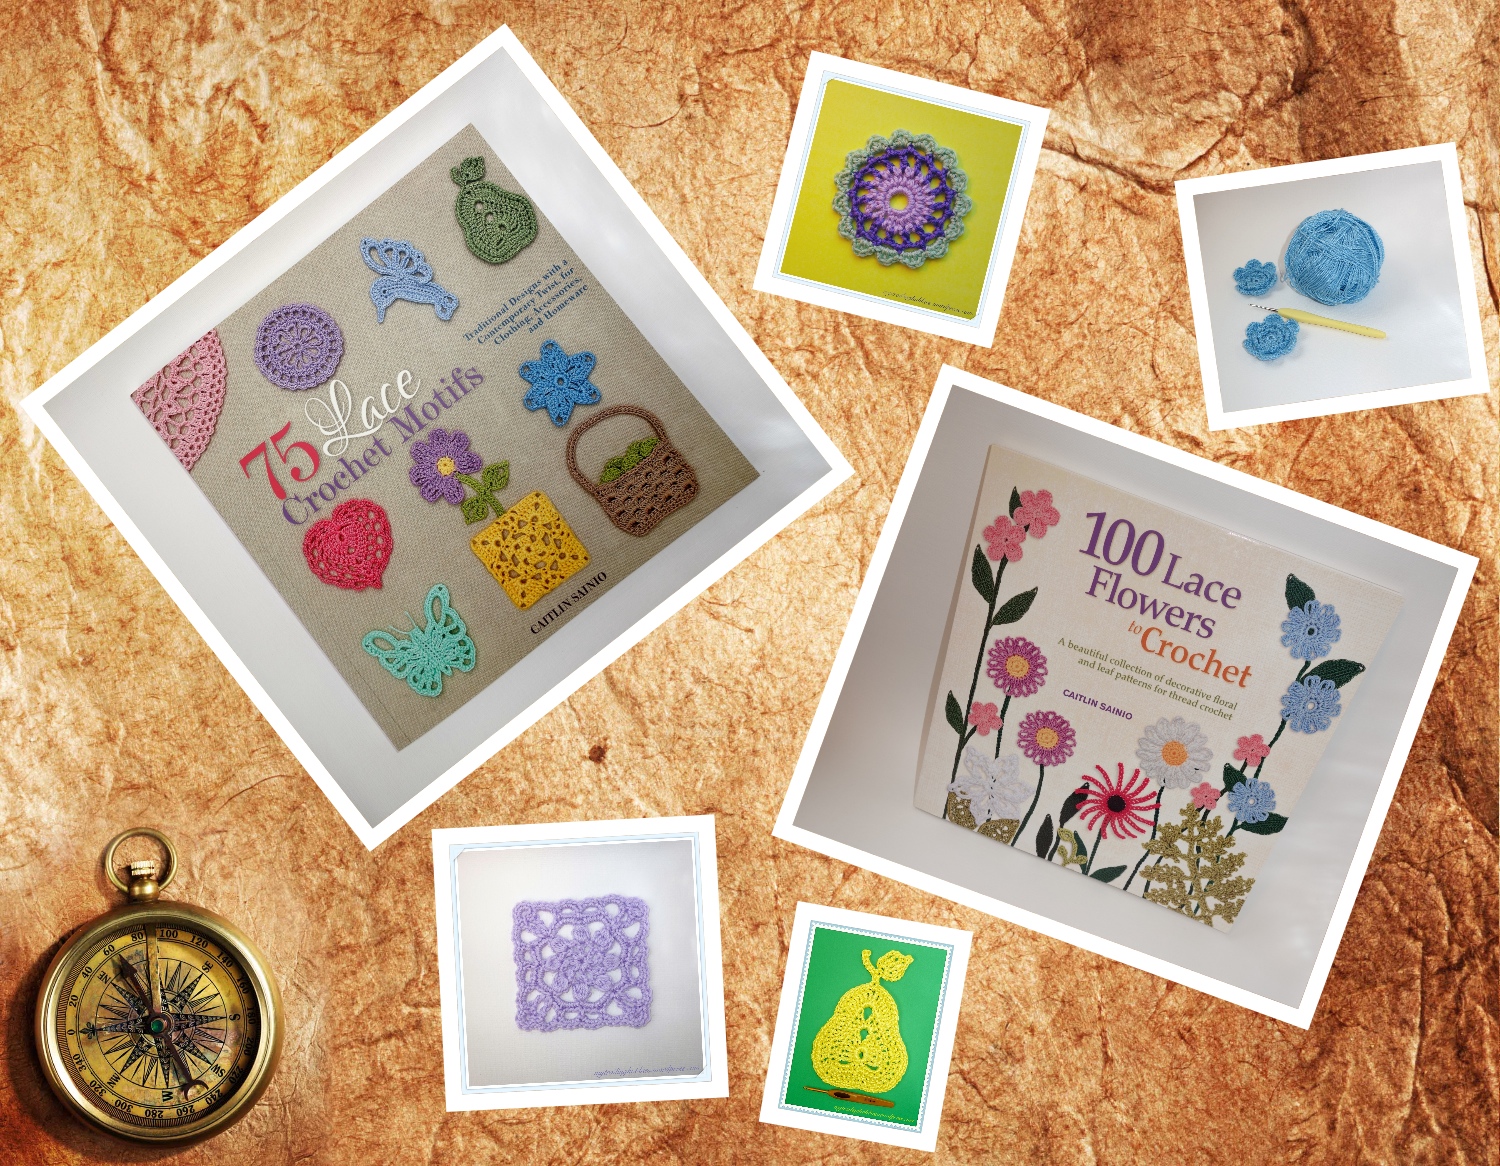
I haven’t decided yet what I’m going to use the motifs for. I might incorporate them in my handmade jewelry, make some free form accent pieces, put together some home decor items, or add them to my collection of coasters. I’m going to use baby yarn, tested and approved for use in baby items, to keep my options open 🙂 The baby yarn is so soft and nice to touch, it will only keep me motivated to keep going and possibly come up or end up with something nice and soft and wearable 🙂
I’ve done a photo a day, a piece of jewelry a day… – little monthly personal projects that were fun and created a cool creative rhythmic routine; that was way before this blog came into being. Now, I’m thinking – why not make a similar project for my crochet thingies! I’m making it a weekly thing; that feels like the right pace at the moment 🙂
The last piece in this project is going to be a micro-version of Square One ! 🙂
N.B.: This project has been suspended due to lack of time; I still love Ms. Sainio’s work and would love to spread the word about her amazing designs while honing my own crocheting skills through this activity 🙂 I intend to get back to it as soon as I have a possibility to!!! ❤ Oct. 14, 2016.


Today, I’ve been thinking – what was my very first crochet project? How did I get interested in crochet?
I remember, at some point, feeling like having a nice and soft and long and delicate necklace that wasn’t metal or plastic 🙂 Then I thought to myself – what if I’d make one using yarn and tiny glass beads…had no idea how though, I’d never crocheted before 🙂
I looked it up online, and sure enough, there were lots of people out there showing how they make crochet thingies. I found a video that taught how to make a bracelet – which was the closest to the picture of a necklace I had in mind 🙂 I was so thankful to the person who took the time to make an instructional video. I can’t remember exactly what video it was, but it was a mom crocheting things for her kids. The process involved crocheting beads onto a foundation chain. I went out a bought some super thin yarn and a crochet hook. My necklace was slightly different – I placed beads within the chain in one step, not onto the chain in a second step, if you know what I mean.
So, my very first crochet project was a tiny necklace, which I could also wear as a bracelet if I wrapped it around my wrist. It fell apart, though, after about two months, as I hadn’t secured the ends well enough for the type of yarn I used.
Here’s my new Shamrock glass bead necklace, which I’ve made using a 3mm crochet hook: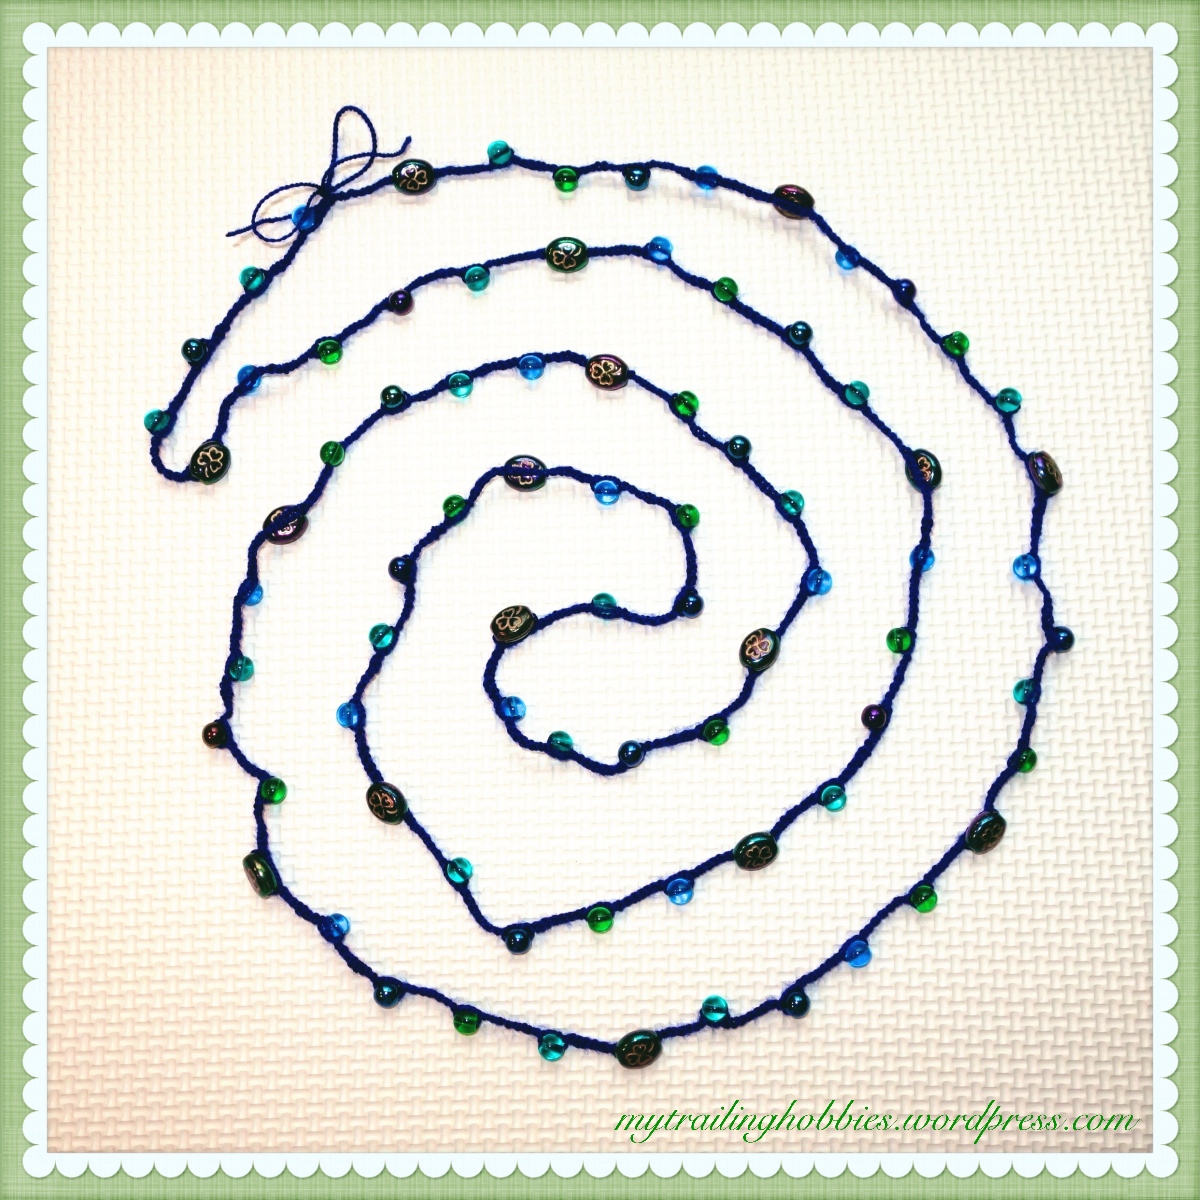
I hope it serves me longer – I’ve used a different technique to secure the ends this time. I like it how it’s so long, soft, and weightless!


Looks like I’ve taken a day or so off here. I’m blaming it on a new interest of mine 🙂 Playing with my camera and a video making app that is 😀 I really wanted to post an update, but I was so swamped with all this new exciting tech stuff that I just didn’t get a chance to, until tonight. I thought I’d incorporate my Circle Crochet Math material in a video. Well, I did, but only a tiny portion, in a loooong video 🙂 I’m still pretty excited that I was able to follow through with my little project!
Check it out 🙂


